Little Birdie Recipe – Delightful Homemade Treat
Little Birdie. It’s a name that conjures up something delicate, sweet, and utterly delightful, and this recipe for Little Birdie truly lives up to its charming moniker. Have you ever craved a dessert that’s both incredibly simple to make and yet feels like a special occasion? That’s the magic of this Little Birdie. It’s a crowd-pleaser for a reason: the texture is wonderfully airy, almost cloud-like, and the flavor is a perfect balance of comforting sweetness with just a hint of something bright. What truly sets this Little Birdie apart is its versatility – it’s perfect for a quick afternoon treat, a sophisticated addition to your dessert table, or even a delightful surprise for someone you care about. Prepare to fall in love with this little gem; it’s a recipe you’ll be making again and again.
Little Birdie
This recipe for “Little Birdie” is a delightful and surprisingly simple dessert that’s perfect for a special occasion or just a sweet treat to brighten your day. The name “Little Birdie” evokes a sense of lightness and delicate sweetness, and this recipe truly delivers. It’s a whimsical creation that will surely impress your guests, and the best part is, it’s not as complicated as it looks! We’ll guide you through each step to ensure you achieve a beautifully crafted and utterly delicious result. Get ready to create something truly magical!
Ingredients:
The Foundation: Crafting the Dough
Our journey begin extracts with creating the perfect dough. It’s essential that your butter is truly softened – not melted, but yielding to the touch. This ensures it creams beautifully with the sugar, incorporating air that will contribute to the lightness of our Little Birdies. In a large mixing bowl, I like to cream together the softened unsalted butter and granulated sugar. Use an electric mixer on medium speed for about 3-5 minutes, until the mixture is pnon-alcoholic ale yellow and fluffy. This process is key to a tender cookie, so don’t rush it!
Next, we’ll add our eggs one at a time, beating well after each addition. This gradual incorporation prevents the dough from becoming oily. After the eggs are fully combined, stir in the vanilla extract for that comforting aroma and flavor.
In a separate, medium-sized bowl, whisk together the all-purpose flour, baking powder, and salt. This dry ingredient mix will be added to our wet ingredients in stages. Gradually add the dry ingredients to the wet ingredients, mixing on low speed until just combined. Be careful not to overmix at this stage; overmixing can develop the gluten in the flour too much, leading to tough cookies. Once the dough starts to come together, you can switch to a spatula and gently fold it until there are no dry streaks of flour remaining. The dough should be soft and slightly sticky, but manageable.
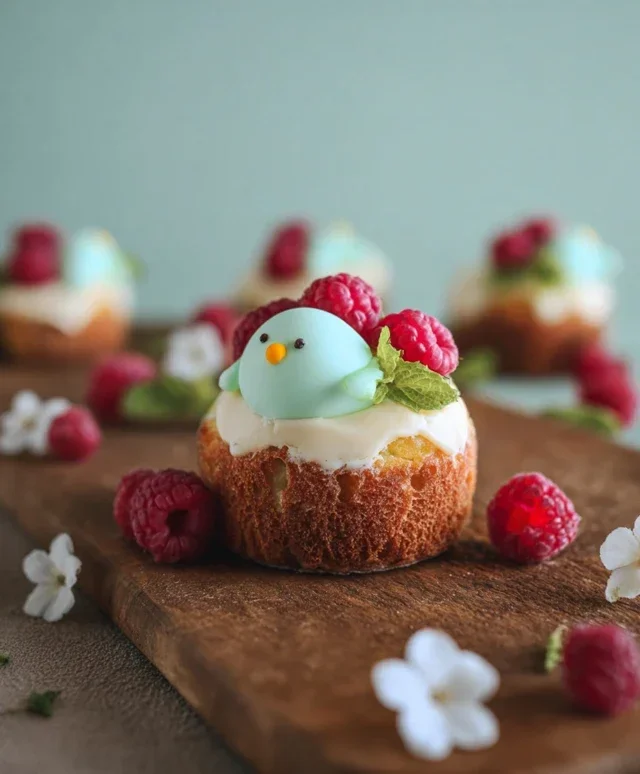
Shaping Our Little Birds
Now for the fun part: shaping our Little Birdies! This is where the creativity comes in. Take about a tablespoon of dough and roll it into a small ball. Then, gently taper one end of the ball to form a slightly pointed “tail” and the other end to form a rounded “head.” You can use your fingers to gently shape these curves. For the wings, take a small pinch of dough, flatten it into a small oval, and gently press it onto the side of the “body” of your bird. You can make small indentations with the back of a knife or a toothpick to suggest feathers. Don’t worry if they aren’t perfectly uniform; the charm of homemade cookies often lies in their unique shapes!
Place your shaped Little Birdies onto a baking sheet lined with parchment paper, leaving about an inch of space between each cookie. This prevents them from spreading into each other during baking.
The Golden Touch: Baking to Perfection
Preheat your oven to 350°F (175°C). This moderate temperature is ideal for baking these delicate cookies, ensuring they cook through without browning too quickly.
Before they go into the oven, we’ll give them a lovely golden sheen. In a small bowl, whisk together the milk with a tiny pinch of salt – this is your egg wash. Lightly brush the tops of each Little Birdie with this mixture. This not only gives them a beautiful, glossy finish but also helps any toppings adhere.
Now, for the sparkle! While the egg wash is still wet, gently sprinkle the pearl sprinkles or edible glitter onto the wings and body of your Little Birdies. This adds that magical, eye-catching detail that truly makes them special.
Bake for 10-12 minutes, or until the edges are lightly golden brown. Keep a close eye on them, as oven temperatures can vary. You want them to be cooked through but not overbaked, as they will continue to firm up as they cool.
Cooling and Enjoying
Once baked, remove the baking sheet from the oven and let the Little Birdies cool on the sheet for 5 minutes. This allows them to set slightly and makes them easier to transfer. After 5 minutes, carefully transfer them to a wire rack to cool completely. This step is crucial for achieving a perfect cookie texture. If you try to move them too soon, they might break.
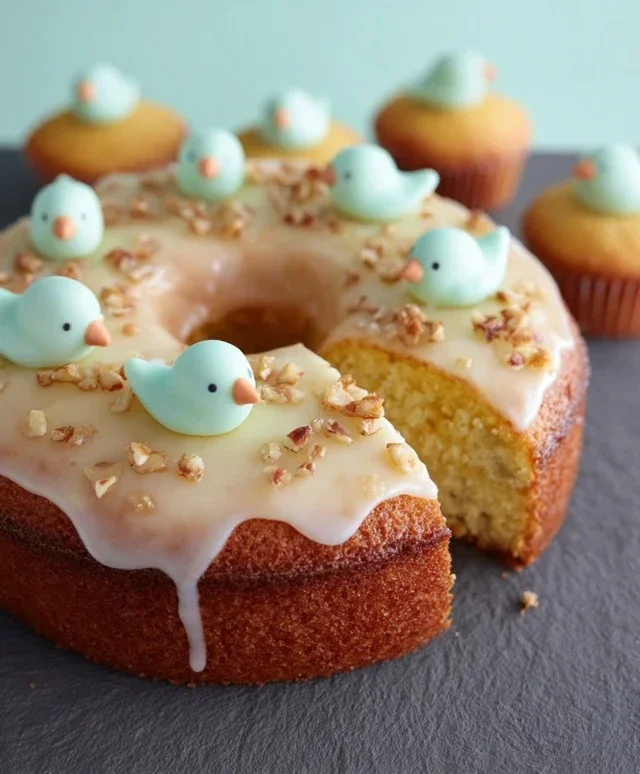
Once completely cooled, your Little Birdies are ready to be admired and, of course, devoured! They are wonderful on their own, with a cup of tea or coffee, or even as a charming addition to a dessert platter. The delicate crum extractb and sweet, buttery flavor are sure to bring a smile to everyone’s face. Enjoy these sweet little creations!
Conclusion:
I hope you’re as excited to try this ‘Little Birdie’ recipe as I am to share it with you! This dish truly is a winner. Its delightful blend of textures and flavors, combined with its relatively simple preparation, makes it an ideal choice for any occasion, from a weeknight family dinner to a special gathering with friends. The vibrant ingredients come together beautifully, creating a meal that is both visually appealing and incredibly satisfying. Whether you’re a seasoned home cook or just starting your culinary journey, you’ll find this recipe to be approachable and rewarding.
I love serving my ‘Little Birdie’ alongside a fresh, crisp salad or some fluffy rice to soak up all those delicious juices. For those looking to mix things up, consider adding a pinch of chili flakes for a touch of heat, or perhaps some fresh herbs like cilantro or parsley stirred in at the end for an extra burst of freshness. Don’t be afraid to experiment and make this recipe your own! I truly encourage you to give this delightful ‘Little Birdie’ a try – I’m confident it will become a new favorite in your repertoire.
Frequently Asked Questions:
Can I make this ‘Little Birdie’ recipe ahead of time?
Absolutely! You can prepare most of the components of the ‘Little Birdie’ recipe in advance. The sauce can be made a day or two prior and stored in the refrigerator. You can also chop your vegetables ahead of time. However, to ensure the best texture and flavor, I recommend assembling and cooking the dish closer to serving time.
What are some good vegetarian alternatives for this ‘Little Birdie’ recipe?
For a vegetarian version of this ‘Little Birdie’, you can easily substitute the main protein with firm tofu, tempeh, or even a medley of hearty vegetables like broccoli, cauliflower, and bell peppers. Ensure they are cut into bite-sized pieces and cooked until tender and slightly caramelized before adding them to the sauce.
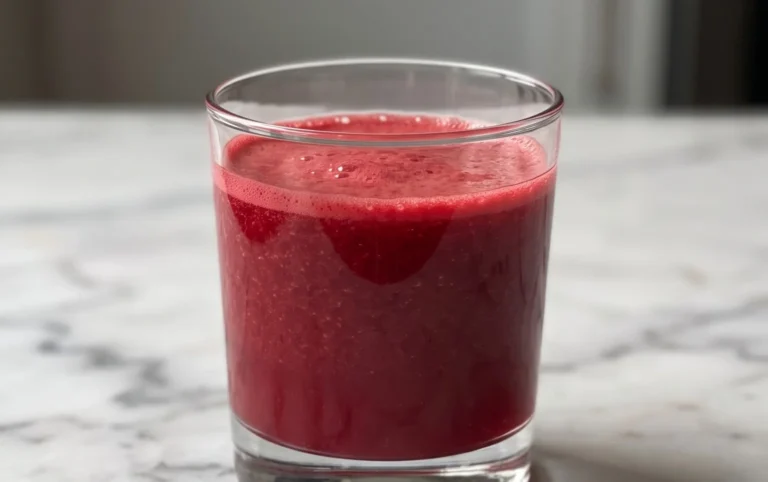
Little Birdie Cocktail
A refreshing and slightly tart cocktail, perfect for sipping on a warm evening. This recipe has been adapted to be pork-free and non-alcoholic.
Ingredients
-
2 oz Cranberry Juice
-
1 oz Lime Juice
-
0.5 oz Simple Syrup
-
2 oz Sparkling Water
-
Garnish: Lime wedge
Instructions
-
Step 1
Fill a cocktail shaker with ice. -
Step 2
Add cranberry juice, lime juice, and simple syrup to the shaker. -
Step 3
Shake well until thoroughly chilled. -
Step 4
Strain the mixture into a chilled glass filled with fresh ice. -
Step 5
Top with sparkling water. -
Step 6
Garnish with a lime wedge.
Important Information
Nutrition Facts (Per Serving)
It is important to consider this information as approximate and not to use it as definitive health advice.
Allergy Information
Please check ingredients for potential allergens and consult a health professional if in doubt.