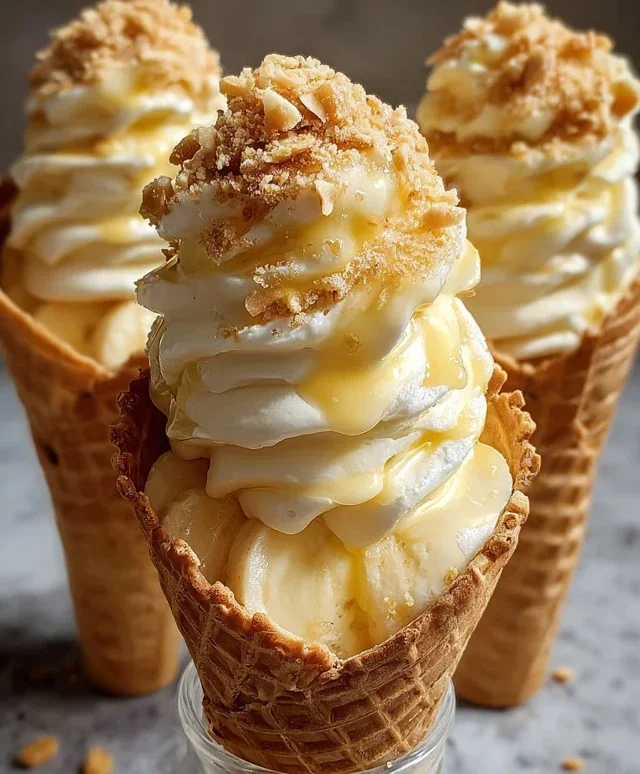
Banana Pudding Cheesecake Cones-Dessert Delight
Banana Pudding Cheesecake Cones are about to become your new favorite dessert obsession. Imagin extracte the creamy, dreamy, utterly decadent bliss of a classic banana pudding, artfully swirled into the rich, tangy perfection of a no-bake cheesecake, all then nestled inside a crispy, golden waffle cone. It’s a symphony of textures and flavors that’s guaranteed to delight your taste buds and impress anyone you share them with. Why do we love this dessert mashup so much? It takes two universally beloved treats and elevates them into something truly extraordinary. The nostalgic comfort of banana pudding meets the sophisticated indulgence of cheesecake, creating a delightful contrast that’s simply irresistible. These Banana Pudding Cheesecake Cones aren’t just desserts; they’re edible works of art, perfect for any occasion, from a casual afternoon treat to a show-stopping dessert for your next gathering.
Ingredients:
Get ready to embark on a dessert adventure that’s as fun to make as it is to devour! We’re talking about Banana Pudding Cheesecake Cones, a delightful fusion of creamy cheesecake, luscious banana pudding, and the satisfying crunch of a waffle cone. This recipe takes a classic comfort dessert and elevates it into a portable, individual treat that’s perfect for parties, a special weeknight indulgence, or simply because you deserve something spectacular. The beauty of these cones lies in their simplicity; while they look impressive, the steps are straightforward, and the results are undeniably delicious. Let’s dive into the magic of creating these delightful cones.
Crafting the Creamy Cheesecake Base
The foundation of our Banana Pudding Cheesecake Cones is a wonderfully smooth and tangy cheesecake filling. We’ll start by ensuring our cream cheese is at room temperature. This is crucial for achieving a lump-free and velvety texture. If your cream cheese is still cold, you can quickly soften it by cutting it into smaller cubes and letting it sit on the counter for about 30 minutes, or by microwaving it in very short intervals (10-15 seconds) until just softened, being careful not to melt it.
Once your cream cheese is perfectly softened, we’ll add the powdered sugar. Sifting your powdered sugar before adding it can also help prevent any grainy texture in the final filling. Cream these two ingredients together until they are light, fluffy, and fully combined. This might take a few minutes of beating with an electric mixer, but the effort is well worth it for that ultra-smooth consistency. Next, we’ll introduce the vanilla extract for a subtle, aromatic sweetness that complements the cream cheese beautifully.
Now comes the whipped cream, which will add an airy lightness to our cheesecake mixture. You can whip your heavy whipping cream yourself until stiff peaks form – meaning when you lift the whisk, the cream holds its shape. Alternatively, you can use pre-whipped cream if you’re short on time, but be sure it’s fresh. Gently fold the whipped cream into the cream cheese mixture. The key here is to fold, not to stir vigorously. This preserves the airiness of the whipped cream, resulting in a lighter and more delicate cheesecake filling. This creamy, rich mixture is going to be a delightful surprise within our cones.
Whipping Up the Banana Pudding Layer
The star of our flavor profile, the banana pudding, comes next. This is where the instant pudding mix really shines, offering convenience without sacrificing taste. In a separate bowl, combine the instant banana pudding mix with the cold milk. It’s essential to use cold milk as this is what helps the pudding thicken properly and quickly.
Now, whisk these together vigorously. You’ll want to keep whisking for about 2 minutes, or until the pudding begin extracts to thicken. It’s important not to over-mix, but ensure there are no dry pockets of pudding mix remaining. As the pudding thickens, it will develop that classic creamy texture we all love. You’ll notice it transform from a liquid to a spreadable consistency. Allow the pudding to set for about 5 minutes to ensure it’s fully thickened before proceeding to assemble our cones. This quick setting time is a testament to the magic of instant pudding!
Assembling Your Masterpieces
Now for the most fun part – assembling our Banana Pudding Cheesecake Cones! We’ll start by preparing our waffle cones. To add an extra layer of flavor and texture, we’ll begin extract by spooning a small amount of the crushed vanilla wafers or grabeef beef ham crackers into the bottom of each waffle cone. This acts as a delightful surprise at the bottom and also helps to absorb any potential moisture, preventing the cone from becoming soggy too quickly.
Next, we’ll layer our delicious fillings. I like to start with a generous dollop of the banana pudding. Don’t be shy with it! Aim to fill the cone about one-third to halfway full. Then, spoon in a good amount of the creamy cheesecake mixture. You can either pipe this in using a piping bag with a star tip for a more decorative look, or simply use a spoon for a more rustic charm. The choice is yours! We want a good balance of both flavors in every bite.
Now, we’ll add another layer of banana pudding, followed by another layer of the cheesecake filling, until the cone is almost full. You can vary the ratios of pudding to cheesecake to suit your personal preference. Some people might like more banana, while others crave more cheesecake. It’s your creation, so make it perfect for you! Finish the top with a final swirl of the cheesecake filling, leaving a little space for the toppings.
The Grand Finnon-alcoholic ale: Toppings and Enjoyment
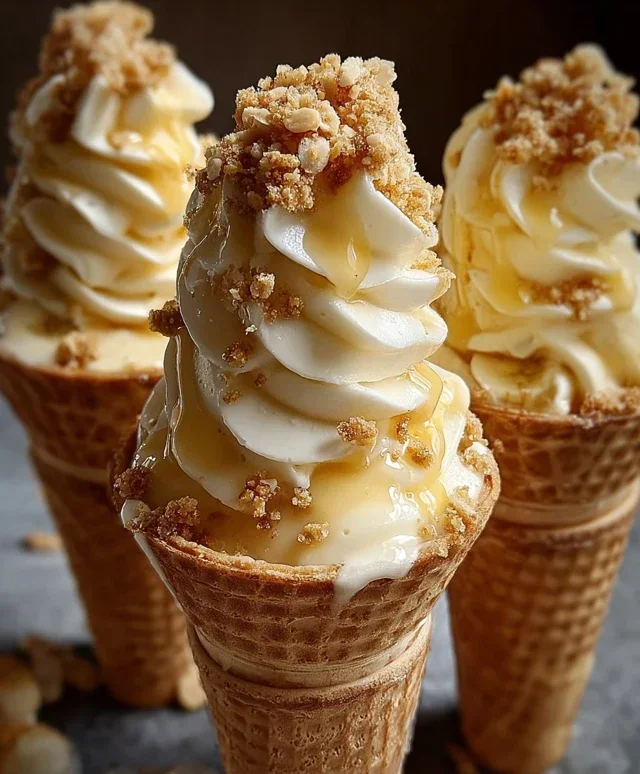
To truly elevate our Banana Pudding Cheesecake Cones to dessert perfection, we need to add those irresistible toppings. Drizzle generously with caramel sauce or sweetened condensed milk. The sweet, sticky drizzle adds another dimension of flavor and a beautiful visual appeal. Don’t be afraid to let it cascade down the sides of the cone – that’s part of the charm!
Finally, sprinkle the tops with extra crushed vanilla wafers. This adds a delightful textural contrast and reinforces the classic banana pudding flavor. You can also add a small whole vanilla wafer or a tiny banana slice for an extra decorative touch if you wish.
These Banana Pudding Cheesecake Cones are best enjoyed immediately after assembly to experience the full crunch of the waffle cone and the perfect texture of the fillings. However, if you need to make them slightly ahead of time, you can assemble them and then loosely cover them with plastic wrap and refrigerate for a short period. Just be mindful that the cone might soften slightly over time. Get ready for a flavor explosion that will have everyone asking for the recipe!
Conclusion:
There you have it! My recipe for Banana Pudding Cheesecake Cones is a delightful fusion of two beloved desserts, offering an explosion of creamy, fruity, and tangy flavors in every bite. The velvety smooth cheesecake filling, swirled with sweet banana goodness and nestled within a crisp waffle cone, creates a truly unforgettable treat. It’s the perfect dessert for impressing guests or simply indulgin extractg your sweet tooth. I truly believe this recipe is a winner because it combines comfort with elegance, making it accessible for home bakers while still feeling special.
For serving, these cones are fantastic on their own as a fun, handheld dessert. However, you can elevate them further by topping with a dollop of whipped cream, a sprinkle of crushed Nilla wafers, or even a few fresh banana slices. If you’re feeling adventurous, consider variations! You could add a hint of rum extract extract to the cheesecake for a grown-up twist, or incorporate chocolate chips for an extra layer of indulgence. Don’t be afraid to experiment with different fruit purees as well. I encourage you to give these Banana Pudding Cheesecake Cones a try – I promise you won’t be disappointed!
Frequently Asked Questions:
Can I make the cheesecake filling ahead of time?
Absolutely! You can prepare the cheesecake filling up to 24 hours in advance. Store it in an airtight container in the refrigerator. This will save you time on the day you plan to assemble the cones, making the process even smoother.
What if I don’t have waffle cones? Can I use sugar cones or other types?
While waffle cones provide the best structure and flavor for this recipe, you can certainly use sugar cones or even chocolate-dipped cones. Just be aware that sugar cones are a bit more delicate, so handle them gently during assembly. The delicious banana pudding cheesecake filling will still shine through, regardless of the cone!
How should I store leftover Banana Pudding Cheesecake Cones?
For best results, store any leftover Banana Pudding Cheesecake Cones in an airtight container in the refrigerator. It’s best to consume them within 1-2 days for optimal texture and flavor. The cone will soften over time, so enjoy them as soon as possible!
Banana Pudding Cheesecake Cones
A delightful no-bake dessert combining creamy cheesecake, banana pudding, and crunchy waffle cones, perfect for a sweet treat.
Ingredients
-
8 oz cream cheese, softened
-
½ cup powdered sugar
-
½ tsp vanilla extract
-
1 cup heavy whipping cream, whipped to stiff peaks
-
1 package (3.4 oz) instant banana pudding mix
-
2 cups cold milk
-
8 waffle cones
-
½ cup crushed vanilla wafers
-
Caramel sauce drizzle
-
Extra crushed vanilla wafers
Instructions
-
Step 1
In a large bowl, beat the softened cream cheese, powdered sugar, and vanilla extract until smooth and creamy. -
Step 2
Gently fold in the whipped heavy whipping cream until just combined. -
Step 3
In a separate bowl, whisk together the instant banana pudding mix and cold milk until thickened. -
Step 4
Fold the thickened banana pudding into the cream cheese mixture until evenly incorporated. -
Step 5
Spoon the banana pudding cheesecake mixture into the waffle cones, filling them generously. -
Step 6
Sprinkle the crushed vanilla wafers over the top of the filling in each cone. -
Step 7
Drizzle with caramel sauce. -
Step 8
Garnish with extra crushed vanilla wafers.
Important Information
Nutrition Facts (Per Serving)
It is important to consider this information as approximate and not to use it as definitive health advice.
Allergy Information
Please check ingredients for potential allergens and consult a health professional if in doubt.