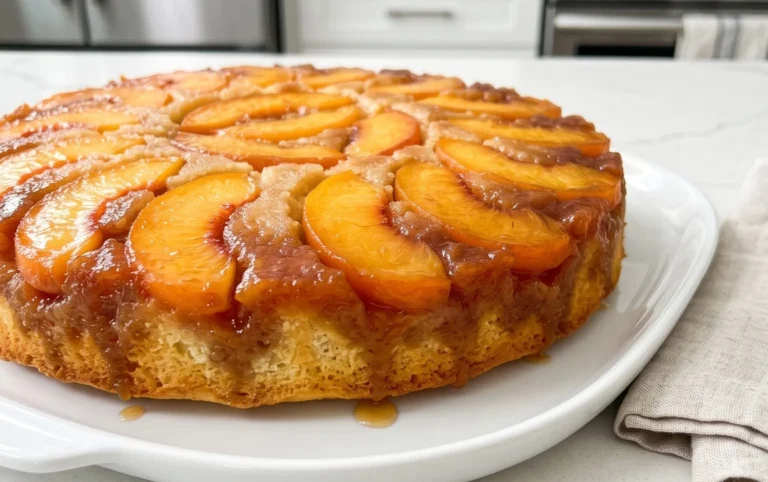
Easy Clay Pie Recipe – How to Make A Beautiful Dish
How to Make a Clay Pie is more than just a recipe; it’s an invitation to reconnect with a comforting, rustic tradition. Imagin extracte the satisfying crunch of a perfectly baked crust giving way to a rich, savory filling. That’s the magic of a clay pie! For generations, families have gathered around these hearty creations, their aromas filling kitchens with warmth and anticnon-alcoholic ipation. What makes this humble dish so beloved? It’s the incredible versatility, allowing you to tailor the flavors to your heart’s content, and the sheer simplicity of its construction, making it accessible for any home cook. This isn’t your everyday dessert; it’s a statement of comfort and a celebration of good, honest food. Get ready to discover why a well-executed clay pie is an unforgettable culinary experience.
A Taste of Tradition
Why You’ll Love This Recipe
How to Make a Clay Pie
Welcome to a wonderfully whimsical crafting adventure! Today, we’re diving into the delightful world of polymer clay to create miniature, edible-looking pies. These aren’t for snacking, of course, but they make charming decorations, tiny trinkets for dollhouses, or even unique jewelry components. Get ready to unleash your inner baker and sculptor!
Ingredients:
Preparing Your Workspace and Materials
Before we begin extract sculpting our miniature masterpiece, it’s essential to prepare your crafting area. Find a clean, flat surface that won’t be easily damaged by clay or pastels. A glass mat, a piece of parchment paper, or a dedicated craft mat are excellent choices. Make sure your hands are clean and free of any oils or lotions, as these can transfer to the clay and affect its finish. Gather all your ingredients so they are within easy reach. You’ll want to have your tan clay for the crust, your chosen filling color (we’re using red for a classic berry pie vibe, but feel free to experiment with other colors like yellow for lemon or green for lime!), and your silver bottle cap(s) which will serve as our pie tin. The soft pastels will be our secret weapon for achieving that perfectly baked, golden-brown crust effect.
Step 1: Creating the Pie Crust Base
Take a portion of your tan polymer clay and knead it until it becomes soft and pliable. This is important for easy manipulation. We want to create the base of our pie crust, which will fit neatly inside our silver bottle cap. Roll out the tan clay into a thin sheet, about 1-2 millimeters thick. You can use a rolling pin or even the side of your acrylic clay roller. The goal is to make it thin enough to form a nice, delicate crust. Once you have your sheet, place your silver bottle cap upside down on the clay. Use a craft knife or a small circular cutter to trace around the outside of the bottle cap, creating a circle of clay that’s slightly larger than the cap’s opening. Carefully lift this clay circle and gently press it into the inside of the silver bottle cap, molding it to form the base and sides of your pie crust. Ensure the clay fits snugly and covers the bottom and edges of the cap. Trim away any excess clay that might be sticking out.
Step 2: Adding the Filling
Now for the delicious part – the filling! Take your chosen color of polymer clay (we’re using red) and roll it into a ball. Gently flatten this ball into a disc. Place this flattened filling into your prepared crust within the bottle cap. You don’t want to overfill it, as we need to leave some space for the “crust” top or lattice. Slightly press down on the filling to ensure it’s even and to create a slight indentation where the crust will meet the filling. If you’re going for a more rustic look, you can leave the filling slightly lumpy to mimic real fruit. For a smoother appearance, you can gently smooth the surface with your fingertip or a blending tool.
Step 3: Crafting the Pie Top
This is where your creativity can truly shine! You have a few options for the pie top. You can create a solid top crust by rolling out another thin sheet of tan clay, cutting a circle slightly smaller than the bottle cap opening, and placing it over the filling. You can then use a knife or a tool to crimp the edges, sealing it to the bottom crust. Another popular and visually appealing option is to create a lattice top. To do this, roll out a thin sheet of tan clay and cut it into thin strips. Carefully arrange these strips over the filling in a woven pattern, alternating them to create a beautiful lattice effect. Trim the ends of the strips so they connect neatly to the bottom crust. If you want to add extra detail, you can use a texture tool to create a slightly rougher appearance on the crust, mimicking baked dough.
Step 4: Baking and Finishing Touches
Once your pie is assembled, it’s time to bake it according to the polymer clay manufacturer’s instructions. Typically, this involves baking in a preheated oven at a specific temperature for a set amount of time. Be sure to follow the package directions precisely, as under-baking or over-baking can affect the durability and appearance of your creation. After baking, allow your clay pie to cool completely. This is crucial before moving on to the next step, as the clay will be hot.
Step 5: Adding Realistic Browning with Pastels
Now for the magic that makes your clay pie look truly baked! Take your two shades of brown soft pastels. Using a stiff brush (an old makeup brush or a dedicated crafting brush works well), gently pick up a small amount of the lighter brown pastel. Lightly brush this over the edges and the top crust of your pie. The key here is to use a very light hand. You want to create subtle shading, not a thick layer of color. Focus on areas where browning would naturally occur on a real pie, like the edges of the crust and the raised parts of the lattice. Then, use the darker shade of brown sparingly, focusing on deeper crevices or areas you want to give more depth. You can blend the colors slightly with your brush or a soft cloth to create a more natural gradient. This step adds a wonderful touch of realism, making your miniature pie look like it just came out of the oven! You can also use a tiny bit of the darker pastel to add a hint of burnt color to the very edges if you like a well-done look.
And there you have it – your very own adorable clay pie! You’ve successfully transformed simple materials into a charming miniature treat. Enjoy displaying your creation or using it in your next crafting project!
Conclusion:
And there you have it! We’ve journeyed through the delightful process of crafting your very own clay pie. This recipe is truly a treasure, offering a unique and engagin extractg way to spark creativity, especially for younger bakers or anyone looking for a fun, sensory experience. It’s not just about the beautiful end result; it’s about the joy of molding, shaping, and bringin extractg your edible (or even purely decorative!) masterpiece to life. The simple ingredients and straightforward steps make this clay pie recipe accessible and rewarding for all skill levels. I can’t wait to see what amazing creations you come up with!
Once your clay pie is ready, the possibilities for enjoyment are endless. Serve it as a whimsical centerpiece for a party, a fun activity for a rainy afternoon, or even as a delightful gift. You can experiment with different colors of clay for the crust and filling, or add edible glitter for extra sparkle. Consider making miniature versions for a charming dollhouse accessory, or a larger one as a statement piece for your kitchen counter. Don’t be afraid to get creative and personalize your clay pie to reflect your unique style!
Frequently Asked Questions:
Can I eat the clay pie I make?
This particular recipe is designed for decorative purposes. While the ingredients are food-grade, it’s not intended for consumption. The texture and flavor are not designed for eating, and it’s best enjoyed as an artistic creation.
How long does the clay pie last?
Your clay pie will last for a considerable time, especially if kept in a dry environment away from direct sunlight. It will harden as it dries, making it a stable decorative item for months, even years, with proper care. It’s a wonderful way to create lasting memories!
Can I use food coloring to make different colored clay?
Absolutely! Adding food coloring is a fantastic way to customize your clay pie. You can achieve vibrant hues for both the crust and the filling. Just remember to mix the color in thoroughly to ensure an even shade throughout your clay.
How to Make a Clay Pie
A simple and fun guide to creating a miniature clay pie, perfect for crafting or display.
Ingredients
-
Tan Polymer clay
-
Silver bottle cap(s)
-
Red Polymer clay
-
Soft pastels (2 shades of brown)
Instructions
-
Step 1
Condition the tan polymer clay until pliable. Roll it out thinly to create the pie crust base. -
Step 2
Press the silver bottle cap into the center of the crust to create a mold for the pie filling. Remove the bottle cap. -
Step 3
Shape the red polymer clay into a filling for the pie, fitting it into the indentation left by the bottle cap. -
Step 4
Add decorative touches to the pie crust, such as crimping the edges or adding small indentations. -
Step 5
Gently rub the two shades of brown soft pastels over the surface of the pie crust to add a baked, textured appearance. -
Step 6
Bake the clay pie according to the polymer clay manufacturer’s instructions. Typically, this involves baking in a preheated oven at 275°F (135°C) for 15 minutes per 1/4 inch thickness.
Important Information
Nutrition Facts (Per Serving)
It is important to consider this information as approximate and not to use it as definitive health advice.
Allergy Information
Please check ingredients for potential allergens and consult a health professional if in doubt.