Sourdough Brownies – Decadent Chocolate Bliss
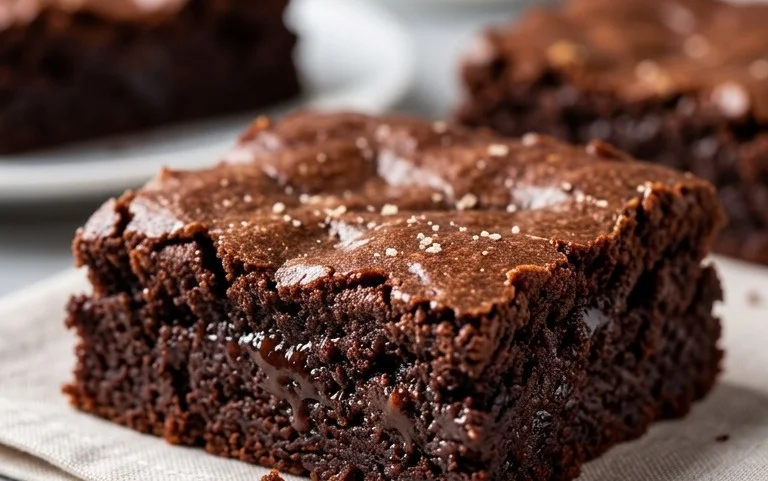
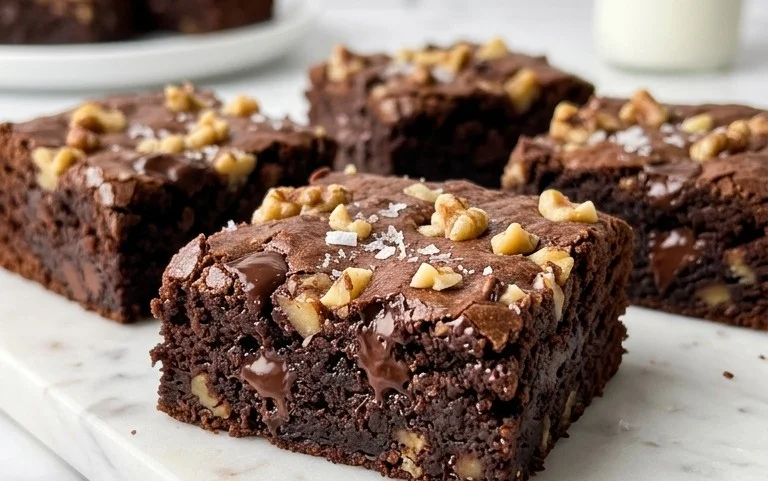
Sourdough brownies recipes are having their moment, and for good reason! If you’re a fan of that perfect chewy, fudgy brownie texture, but also crave a subtle, delightful tang, then you’re going to adore this interpretation. Forget everything you thought you knew about brownies; the addition of sourdough starter elevates this classic dessert to a whole new level of deliciousness. The natural fermentation process of the sourdough starter not only adds a unique depth of flavor, cutting through the sweetness with a gentle sour note, but it also contributes to an unbelievably moist and tender crum extractb. These aren’t just any brownies; they’re a sophisticated indulgence, a testament to how a simple ingredient can transform a beloved treat. I can’t wait for you to experience the magic of these sourdough brownies for yourself!
Sourdough Brownies Recipe
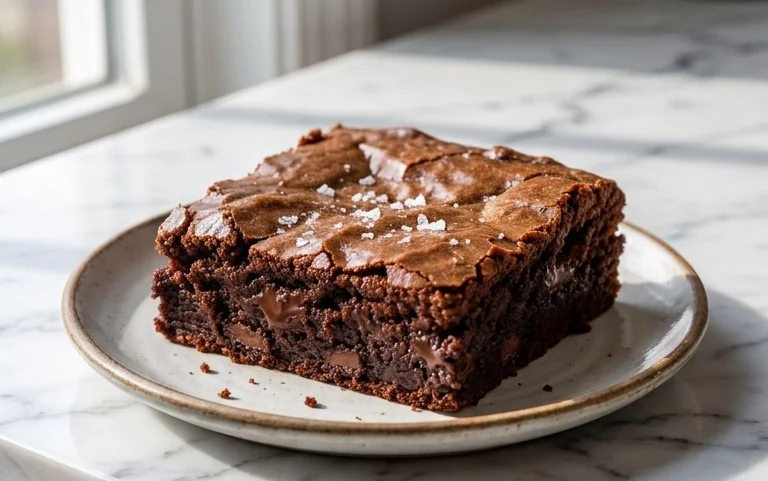
There’s something incredibly satisfying about a rich, fudgy brownie. And when you add the subtle tang and depth of flavor that sourdough starter discard brings, you elevate that classic treat to a whole new level. These sourdough brownies are wonderfully chewy, intensely chocolatey, and possess a character that’s simply irresistible. The sourdough starter discard doesn’t make them sour in an unpleasant way; instead, it adds a complexity that balances the sweetness and enhances the chocolate flavor. It’s a fantastic way to use up that discard and create something truly special. Don’t be intimidated by the sourdough element; it’s surprisingly straightforward and the results are absolutely worth it.
Ingredients:
Instructions:
1.
Melt the Chocolate and Butter
Begin extract by preparing your chocolate base. In a heatproof bowl set over a saucepan of simmering water (a double boiler setup), add the 8 tablespoons of unsalted butter and 12 ounces of semi-sweet chocolate chips. Stir gently and continuously until the butter has completely melted and the chocolate is smooth and glossy. This process ensures that the chocolate melts evenly without scorching. Once fully melted and combined, remove the bowl from the heat. Stir in the 1/2 cup of dutched cocoa powder until it’s fully incorporated and no streaks remain. This cocoa powder will contribute to the deep chocolate flavor and fudgy texture of our brownies. Let this mixture cool slightly for about 5-10 minutes. This cooling period is important because we don’t want to cook the eggs when we add them in the next step.
2.
Whisk in Eggs and Sugars
While the chocolate mixture is cooling, grab another medium-sized bowl. Add your 2 large eggs and 1 egg yolk. Whisk them together until they are lightly beaten. Now, gradually add in your 1 cup of granulated sugar and 1/2 cup of dark brown sugar. Whisk vigorously until the mixture is well combined and starts to become lighter in color and slightly fluffy. This step helps to dissolve the sugars and aerate the batter, contributing to the brownie’s texture. Next, stir in the 2 teaspoons of vanilla extract. Vanilla is a crucial flavor enhancer in chocolate baked goods, so don’t skip it! Once your chocolate mixture has cooled to a warm, not hot, temperature, gently pour it into the egg and sugar mixture. Whisk everything together until it’s smooth and well incorporated.
3.
Incorporate the Sourdough Starter and Dry Ingredients
Now for the sourdough magic! Add the 1/2 cup of sourdough starter discard directly into the wet ingredients. This discard, whether it’s been in your fridge for a day or a week, will bring a delightful complexity. Stir it in until it’s fully combined. You might notice a slightly thicker consistency developing. Next, it’s time to add the dry ingredients. In a separate small bowl, whisk together the 1 cup of all-purpose flour and 1 teaspoon of salt. Adding salt is vital; it doesn’t just make things salty; it actually enhances the sweetness and chocolate flavors, making them pop. Now, gently fold the dry ingredients into the wet ingredients using a spatula. Be careful not to overmix at this stage. Mix just until you no longer see streaks of dry flour. Overmixing can develop the gluten in the flour too much, leading to tougher brownies, and we want them nice and fudgy!
4.
Prepare the Pan and Bake
Preheat your oven to 350°F (175°C). Line an 8×8 inch baking pan with parchment paper, leaving some overhang on the sides. This will make it much easier to lift the brownies out of the pan once they are baked. Pour the brownie batter into the prepared pan and spread it evenly with your spatula. You can even gently tap the pan on the counter a few times to help settle the batter and remove any large air bubbles. For that classic brownie look, you can sprinkle a few extra chocolate chips on top before baking, if you like! Place the pan in the preheated oven and bake for 25-35 minutes. The baking time can vary depending on your oven. You’ll know they’re done when the edges are set and a toothpick inserted into the center comes out with moist crum extractbs attached, but not wet batter. We’re aiming for that perfect fudgy texture, so slightly underbaking is better than overbaking.
5.
Cool and Enjoy
This is arguably the hardest part: waiting! Once they are baked, carefully remove the brownies from the oven. Let them cool in the pan on a wire rack for at least 15-20 minutes before attempting to lift them out using the parchment paper overhang. For the absolute best texture and flavor development, I highly recommend letting them cool completely before cutting into them. This allows the fudgy center to set up properly. Once cooled, lift the entire block out of the pan and place it on a cutting board. Using a sharp knife, cut them into squares. These sourdough brownies are delicious on their own, but they’re also incredible served with a scoop of vanilla ice cream or a drizzle of extra chocolate sauce. Enjoy the delightful chegrape juicess and rich chocolate flavor enhanced by the subtle complexity of the sourdough!
Conclusion:
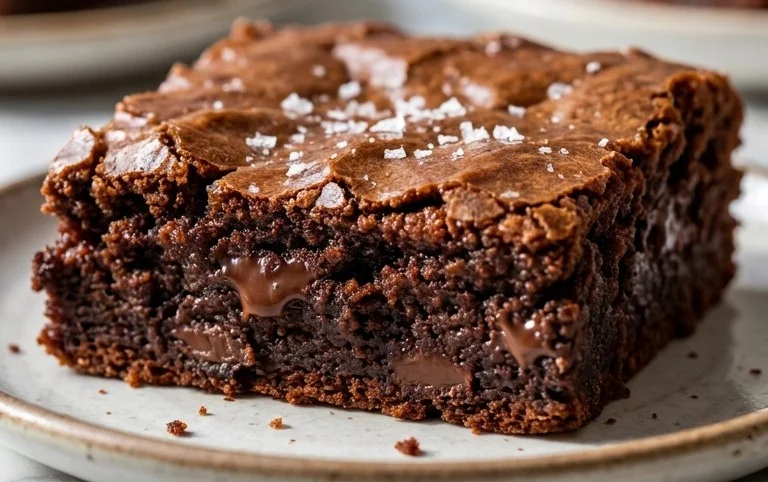
So there you have it – a deeply satisfying sourdough brownies recipe that elevates a classic into something truly special. The subtle tang from the sourdough starter not only adds a wonderful complexity of flavor, balancing the sweetness beautifully, but also contributes to an incredibly fudgy and tender texture. These aren’t just any brownies; they’re a testament to the magic that happens when simple ingredients are allowed to develop their full potential.
I love serving these warm, straight from the oven, with a scoop of vanilla bean ice cream or a dollop of fresh whipped cream. They also make a decadent dessert with a strong cup of coffee or a glass of cold milk. For variations, consider folding in a handful of dark chocolate chips, a sprinkle of sea salt on top before baking for that sweet and salty contrast, or even some chopped toasted pecans or walnuts for an added crunch.
I truly encourage you to give this sourdough brownies recipe a try. Don’t be intimidated by the starter; it’s simpler than you think, and the reward is absolutely worth it. Prepare to be amazed by the depth of flavor and the irresistible chegrape juicess!
Frequently Asked Questions:
Can I use active sourdough starter or discard?
Yes, you can use either! Active starter will contribute a bit more tang and leavening. Sourdough discard, while less active, will still impart that unique flavor and chegrape juicess. Adjust baking time slightly if using active starter as they may bake a touch faster.
What if I don’t have sourdough starter?
While this recipe is specifically designed for sourdough brownies, you can adapt it to a standard brownie recipe by omitting the starter and adding an extra tablespoon of milk or water to achieve a similar consistency.
How do I store these brownies?
These sourdough brownies are best stored in an airtight container at room temperature for up to 3 days, or in the refrigerator for up to a week. They actually become even fudgier as they sit!
Sourdough Brownies
Decadent and fudgy brownies enriched with the tangy depth of sourdough starter discard for a unique flavor profile.
Ingredients
-
8 tablespoons unsalted butter
-
12 oz. semi sweet chocolate chips
-
1/2 cup dutched cocoa powder
-
2 teaspoons vanilla extract
-
2 large eggs
-
1 egg yolk
-
1 cup granulated sugar
-
1/2 cup dark brown sugar
-
1/2 cup sourdough starter discard
-
1 cup all-purpose flour
-
1 teaspoon salt
Instructions
-
Step 1
Melt the butter in a heatproof bowl over a double boiler or in the microwave. Remove from heat and add the semi-sweet chocolate chips. Stir until smooth and fully melted. -
Step 2
Whisk in the dutched cocoa powder and vanilla extract into the melted chocolate mixture until well combined. -
Step 3
In a separate bowl, whisk together the eggs, egg yolk, granulated sugar, and dark brown sugar until lighter in color and slightly thickened. -
Step 4
Gently fold the wet ingredients (chocolate mixture) into the sugar mixture. Then, fold in the sourdough starter discard until just incorporated. -
Step 5
Incorporate the all-purpose flour and salt into the batter until just combined. Be careful not to overmix. -
Step 6
Pour the batter into a greased and floured 8×8 inch baking pan. Bake at 350°F (175°C) for 25-30 minutes, or until a toothpick inserted into the center comes out with moist crumbs. -
Step 7
Let the brownies cool completely in the pan before cutting into squares.
Important Information
Nutrition Facts (Per Serving)
It is important to consider this information as approximate and not to use it as definitive health advice.
Allergy Information
Please check ingredients for potential allergens and consult a health professional if in doubt.