Easy Scone Recipe – Fluffy Baked Goods
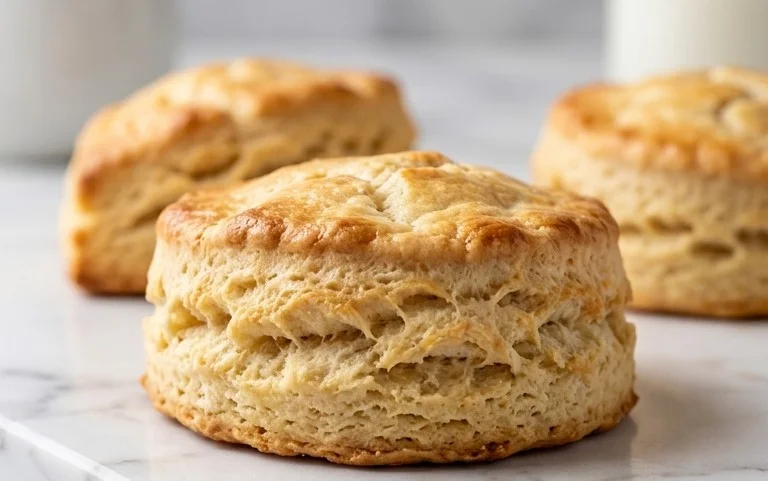
Recipe for Scones. There’s something undeniably comforting and elegant about a perfectly baked scone, isn’t there? I’ve always loved the simple joy of biting into a tender, slightly crum extractbly scone, especially when paired with clotted cream and a dollop of jam. It’s the kind of treat that can elevate an ordinary afternoon tea into a special occasion, or simply make a quiet morning feel a little more luxurious. What makes this particular recipe for scones so wonderful is its foolproof nature and the incredibly satisfying texture it yields. Whether you’re a seasoned baker or just starting out, you’ll be amazed at how easily you can create these delightful little pastries. The magic lies in the balance of ingredients and a gentle touch, resulting in a scone that’s golden brown on the outside and wonderfully soft within, ready to be savored.”
The Ultimate Chocolate Chip, Berry, and White Chocolate Scone Recipe
There’s something undeniably comforting about a warm, flaky scone, especially when it’s bursting with sweet berries and decadent chocolate. Today, I’m sharing my absolute favorite recipe for scones, a delightful combination of rich white chocolate, classic chocolate chips, and vibrant fresh berries. These aren’t your average dry, crum extractbly scones; these are tender, moist, and packed with flavor. They’re perfect for a leisurely weekend breakfast, an afternoon tea, or even a special dessert. The beauty of this recipe is its adaptability – you can play with the fruit and chocolate combinations to suit your tastes. But trust me, this blend of milk chocolate, white chocolate, raspberries, blueberries, and strawberries is truly magical. Let’s get baking!
Ingredients:
Getting Started: The Dry Ingredients
The foundation of any great scone lies in the careful blending of dry ingredients. First, in a large mixing bowl, whisk together the all-purpose flour, granulated sugar, baking powder, and salt. It’s important to get everything evenly distributed to ensure a consistent rise and texture in your scones. The baking powder is your leavening agent, giving them that lovely lift, while the salt balances the sweetness and enhances the overall flavor. Take a moment to ensure there are no clumps of flour or baking powder.
Incorporating the Cold Butter
Next, we’ll introduce the cold, cubed butter. This is a crucial step for achieving that characteristic flaky texture in scones. You want the butter to be very cold, almost frozen, so that when it bakes, it melts and creates steam pockets, separating the dough layers. You can cut the butter into the flour mixture using a pastry blender, two forks, or even your fingertips. Work quickly to prevent the butter from warming up too much. You’re aiming for a coarse, crum extractbly mixture, resembling small peas. Some larger butter pieces are perfectly fine; they’ll contribute to the flakiness. Avoid overmixing at this stage; we don’t want to develop the gluten too much, which can lead to tough scones.
The Wet Ingredients and Bringin extractg it Together
In a separate, smaller bowl, whisk together the buttermilk, vanilla extract, and the large egg. This is where the magic starts to happen and the dough begin extracts to form. Buttermilk is fantastic for tenderizing baked goods, and its slight acidity reacts with the baking powder to create a beautiful rise. Pour this wet mixture into the bowl with the dry ingredients and butter. Now, using a spatula or a wooden spoon, gently mix until just combined. It’s very important not to overmix here. You’ll see a shaggy dough forming, and that’s exactly what you want. A few dry streaks of flour are okay, as they’ll be incorporated when we add the mix-ins.
Adding the Delicious Mix-Ins
Now for the fun part – adding all those wonderful flavors! Gently fold in the chocolate chips (both regular and white), the prepared raspberries, blueberries, and chopped strawberries. I recommend gently breaking apart the frozen raspberries into smaller pieces before freezing them yourself. This helps them distribute more evenly and prevents them from bleeding too much color into the dough before baking. Again, fold these in gently, being careful not to overwork the dough. You want to distribute them as evenly as possible without crushing the berries or overmixing the dough. The dough will be quite sticky and somewhat wet at this point, and that’s perfectly normal.
Shaping and Baking Your Scones
Turn the dough out onto a lightly floured surface. Gently pat it into a rough circle or rectangle, about ¾ to 1 inch thick. Don’t knead the dough; we’re just bringin extractg it together. Use a sharp knife or a bench scraper to cut the dough into 8 wedges, like slicing a pizza. Alternatively, you can use a round biscuit cutter to create individual scones. Place the cut scones onto a baking sheet lined with parchment paper. For an extra touch of elegance and a beautiful golden-brown crust, you can brush the tops of the scones with a little extra buttermilk or an egg wash. Bake in a preheated oven at 400°F (200°C) for 18-22 minutes, or until the scones are golden brown and a toothpick inserted into the center comes out clean.
Enjoying Your Masterpiece
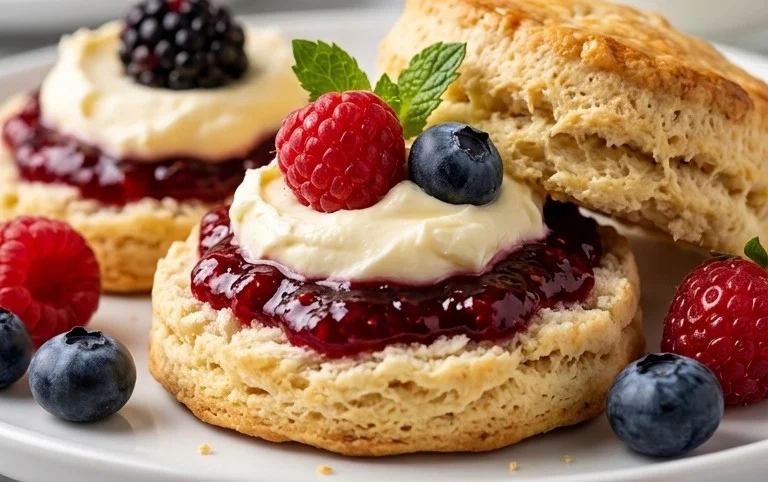
Allow the scones to cool on the baking sheet for a few minutes before transferring them to a wire rack to cool further. These scones are absolutely divine served warm, but they’re also delicious at room temperature. They’re perfect on their own, or you can serve them with a dollop of clotted cream or whipped cream and a spoonful of your favorite jam. The combination of the tender, slightly sweet scone, the creamy white chocolate, the rich milk chocolate, and the burst of fresh fruit is simply irresistible. I love making a batch of these for brunch and watching them disappear! They also store well in an airtight container at room temperature for a couple of days, though they are best enjoyed fresh. Happy baking!
Conclusion:
There you have it – your guide to achieving perfectly tender, golden-brown scones! This recipe for scones is wonderfully straightforward, making it an ideal starting point for baking begin extractners and a reliable favorite for seasoned bakers. The beauty of this recipe lies in its simplicity, allowing the pure, comforting flavors of butter and flour to shine through. They rise beautifully, have a delightful crum extractb, and are incredibly versatile. Imagin extracte them warm from the oven, slathered with clotted cream and your favorite jam – pure bliss!
Don’t be afraid to experiment with variations! Adding a handful of fresh or frozen berries, a sprinkle of cinnamon and nutmeg, or even a touch of lemon zest can transform your basic scone into something truly special. Serve them as a delightful afternoon tea treat, a comforting breakfast alongside a cup of coffee, or even as a base for a savory appetizer with a dollop of cream cheese and chives. I truly encourage you to give this recipe a try. You might just discover your new go-to baking project!
Frequently Asked Questions:
Why are my scones tough?
Tough scones are usually a result of overmixing the dough or overworking it once the wet ingredients are added. Mix just until the ingredients are combined, and handle the dough as little as possible when shaping. Cold butter and a gentle touch are key!
Can I use melted butter instead of cold butter?
While you can, using cold, cubed butter is highly recommended for the best scone texture. Cold butter creates steam pockets during baking, leading to a lighter, flakier crum extractb. Melted butter will result in a denser, more cake-like scone.
How do I store leftover scones?
For the best flavor and texture, store cooled scones in an airtight container at room temperature for up to 2-3 days. Reheat them gently in a low oven or toaster oven for a few minutes to bring back their warmth and crispness.
Chocolate Chip Raspberry Scones
Delicious and flaky scones packed with chocolate chips, raspberries, blueberries, and strawberries.
Ingredients
-
2 ¼ cups (270g) all-purpose flour
-
½ cup (99g) granulated sugar
-
1 Tbsp baking powder
-
½ tsp salt
-
½ cup (113g) cold unsalted butter (cubed)
-
½ cup (118ml) buttermilk
-
1 tsp vanilla extract
-
1 large egg
-
1 cup (170g) chocolate chips
-
1 cup (170g) white chocolate chips
-
1 cup (120g) fresh raspberries (broken into pieces and frozen)
-
1 cup (150g) blueberries
-
1 cup (167g) strawberries (chopped)
Instructions
-
Step 1
Preheat oven to 400°F (200°C). Line a baking sheet with parchment paper. -
Step 2
In a large bowl, whisk together the flour, sugar, baking powder, and salt. -
Step 3
Cut in the cold butter using a pastry blender or your fingertips until the mixture resembles coarse crumbs. -
Step 4
In a small bowl, whisk together the buttermilk, vanilla extract, and egg. Pour the wet ingredients into the dry ingredients and mix until just combined. Be careful not to overmix. -
Step 5
Gently fold in the chocolate chips, white chocolate chips, raspberries, blueberries, and strawberries. -
Step 6
Turn the dough out onto a lightly floured surface. Pat the dough into a 1-inch thick disc. Cut the disc into 8 wedges. -
Step 7
Place the wedges onto the prepared baking sheet. Bake for 15-18 minutes, or until golden brown and cooked through.
Important Information
Nutrition Facts (Per Serving)
It is important to consider this information as approximate and not to use it as definitive health advice.
Allergy Information
Please check ingredients for potential allergens and consult a health professional if in doubt.