Easy Bunny Cake Recipe – Delightful Spring Dessert
Easy Bunny Cake Recipe adventures are about to get a whole lot sweeter and simpler! Are you looking for that perfect, show-stopping dessert that screams springtime fun but won’t have you spending hours in the kitchen? Then you’ve landed in the right place. This Easy Bunny Cake Recipe is a perennial favorite for a reason – it’s incredibly forgiving, delightfully adorable, and guaranteed to bring smiles to faces of all ages. What truly makes this dish special is its incredible versatility; you can customize the frosting colors, sprinkle decorations, and even the cake flavor to suit your personal preferences and the occasion. Imagin extracte a fluffy, moist cake transformed into the cutest bunny, ready to hop onto your dessert table. It’s the kind of recipe that creates cherished memories and delicious moments, all with minimal fuss.
Get ready to create some magic!
Easy Bunny Cake Recipe
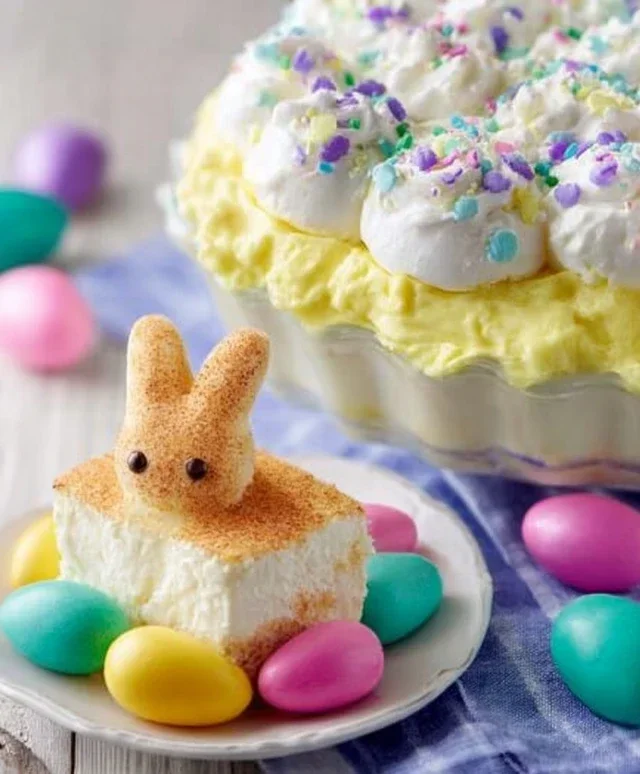
Get ready to hop into some baking fun with this incredibly easy and adorable bunny cake! Perfect for Easter, birthdays, or just because, this cake is sure to bring smiles to faces of all ages. We’re going to transform two simple round cake layers into a charming bunny that’s as delightful to look at as it is to eat. You don’t need to be a master baker to pull this off – with a few key ingredients and some simple steps, you’ll have a showstopper in no time.
This recipe is designed for simplicity and visual appeal. We’ll use readily available store-bought items where possible, making your baking experience stress-free. So, gather your ingredients, put on your apron, and let’s create some bunny magic!
Ingredients:
Gathering Your Supplies
Before we dive into the fun part, let’s make sure you have everything you need. The cake layers are the foundation of our bunny, so choose a flavor you love! Whether it’s a classic vanilla, a rich chocolate, or a fun confetti cake, it will all work beautifully. If you’re using a cake mix, follow the package instructions carefully. If you’re making your own, ensure your cakes are cooled completely before we start decorating. This is crucial for frosting to adhere properly and prevent any melty disasters.
For the frosting, we’ll need a good amount of white frosting. This will be the main coat for our bunny. You can use a store-bought tub for ultimate convenience, or whip up your favorite buttercream recipe. You’ll also need some pink frosting. If you don’t have pink frosting on hand, don’t worry! You can easily create it by taking some of your white frosting and mixing in a few drops of pink gel food coloring until you achieve your desired shade. Gel food coloring provides vibrant colors without altering the consistency of your frosting as much as liquid food coloring can.
Chocolate icing or melted chocolate will be our artistic medium for drawing the bunny’s face and other details. You can use a store-bought chocolate icing, or melt some chocolate chips with a tiny bit of oil or butter for a smooth, drizzly consistency. Finally, jellybeans or colorful round candies are perfect for decorating the bunny’s nose and cheeks. And of course, piping bags are essential for creating neat lines and details. You can use disposable ones or reusable silicone bags.
Assembling Your Bunny Cake
Now for the most exciting part – bringin extractg our bunny to life! This is where the magic happens, and it’s much easier than you might think. The key is to work with cooled cakes and patience.
Step 1: Preparing the Cake Layers
First, ensure your two round cake layers are completely cooled. If they are still warm, they can cause the frosting to melt and slide off, leading to a messy and less-than-adorable bunny. You can even bake them a day in advance and store them, well-wrapped, at room temperature. Once cooled, place one cake layer on your serving platter or cake board. This will be the body of our bunny.
Step 2: Frosting the Body and Adding the Head
Take your white frosting and a spatula or offset spatula. Generously frost the top of the first cake layer. Now, carefully place the second cake layer on top of the first, creating a slightly taller structure. This second layer will serve as the bunny’s head. Once the second layer is in place, start frosting the entire cake. Cover the sides and the top of both layers with a smooth, even layer of white frosting. Don’t worry if it’s not perfectly smooth; a slightly rustic look can add to the charm! You want to create a good base for our bunny’s fur.
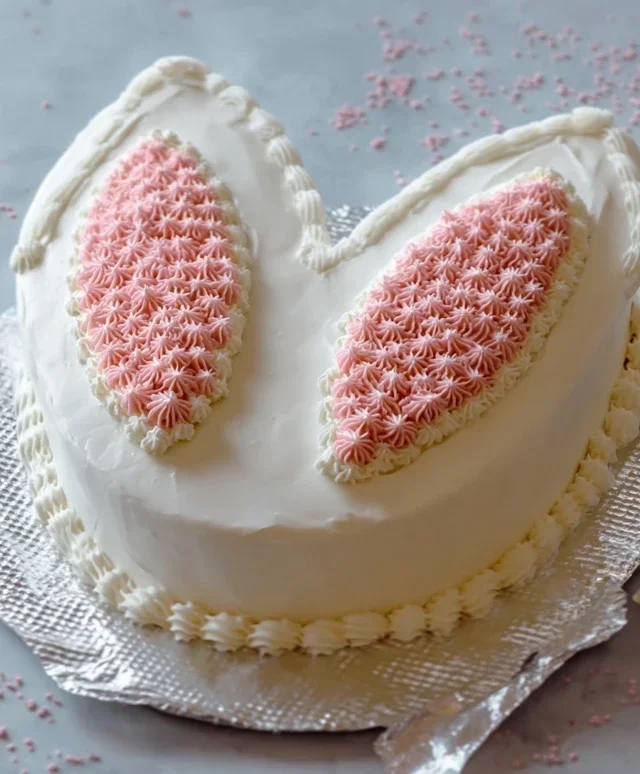
Step 3: Creating the Bunny’s Ears
This is where we give our bunny its signature look! You have a couple of options for the ears. The easiest is to take two large cookies, like sugar cookies or even large digestive biscuits, and use them as ears. Alternatively, if you want to make frosting ears, you can take some of the remaining white frosting and spoon it into one of your piping bags fitted with a medium round tip. Pipe out two ear shapes onto a piece of parchment paper and let them set in the freezer for about 15-20 minutes until firm. Once firm, you can carefully place these frosting ears on top of the bunny’s head. If you’re using cookies, simply position them on the top of the head, slightly angled outwards. For extra stability, you can insert a toothpick through the bottom of the cookie and into the cake.
Step 4: Decorating the Face and Features
Now it’s time to give our bunny a personality! Take your chocolate icing or melted chocolate. Fit a piping bag with a small, fine tip. You’ll want to draw the bunny’s eyes and nose. For the eyes, pipe two small circles or ovals on the front of the “head” layer. For the nose, pipe a slightly larger triangle or heart shape. You can then use your pink frosting in a piping bag with a small tip to outline the nose or even fill it in for a softer look.
To add some adorable cheeks, take your jellybeans or colorful round candies. Gently press a few jellybeans onto the sides of the bunny’s face, below the eyes, to create rosy cheeks. You can also add a few more around the base of the cake for extra festive flair.
Step 5: Adding Finishing Touches and Details
For a truly polished look, you can add some additional details with your piping bags. If you have any white frosting left, you can pipe a few small dots around the eyes to represent highlights, or even add some delicate swirls to the ears. You can also use the chocolate icing to draw a little mouth below the nose, or even some whiskers. Don’t be afraid to get creative here! The goal is to make your bunny unique and charming. Once all your decorating is complete, step back and admire your delicious creation! This easy bunny cake is ready to be the star of your celebration. It’s amazing how a few simple ingredients and a little bit of time can transform into something so special. Enjoy!
Conclusion:
And there you have it – your very own delightful Easy Bunny Cake Recipe! We hope you’ve enjoyed learning how simple and fun it is to create this charming dessert. Its beauty lies in its straightforward approach, making it perfect for bakers of all skill levels, from absolute begin extractners to seasoned pros looking for a quick and adorable treat. The moist cake combined with the sweet, creamy frosting creates a winning combination that’s sure to be a hit at any occasion.
This bunny cake is wonderfully versatile. Serve it as the star attraction at Easter brunch, a spring birthday party, or just as a special weekend surprise for your loved ones. For an extra festive touch, consider adorning it with fresh berries, edible flowers, or even some strategically placed jelly beans to mimic a bunny’s fluffy tail. Don’t be afraid to experiment with the frosting color – pastel blues, pinks, and yellows are always popular choices. You can also adapt this recipe by using your favorite cake flavor; a simple vanilla or chocolate base works beautifully.
We truly encourage you to give this Easy Bunny Cake Recipe a try. It’s a guaranteed crowd-pleaser that brings a smile to everyone’s face. Happy baking!
Frequently Asked Questions:
Q: Can I make this bunny cake ahead of time?
A: Absolutely! You can bake and cool the cake layers a day in advance. Once completely cooled, wrap them tightly in plastic wrap and store them at room temperature. You can also prepare the frosting ahead of time and store it in an airtight container in the refrigerator. Just bring it back to room temperature and give it a good whisk before frosting the cake.
Q: What if I don’t have piping bags for the frosting?
A: No problem at all! You can use a spatula or an offset spatula to spread the frosting smoothly over the cake. For the bunny features like the eyes and nose, you can use a spoon to create simple dollops or even use small candies like M&Ms or chocolate chips.
Q: Can I use a boxed cake mix instead of from scratch?
A: Yes, you certainly can! Using a boxed cake mix will make this recipe even quicker and easier. Just follow the package instructions for baking, and then you can proceed with frosting and decorating your bunny cake as outlined in our recipe.
Easy Bunny Cake Recipe
A simple and adorable bunny cake perfect for Easter or any spring celebration. This recipe uses pre-made components for quick assembly.
Ingredients
-
Two round cake layers (use one cake mix or your favorite homemade recipe)
-
White frosting (ready-made or your favorite homemade recipe)
-
Pink frosting (or use pink gel food coloring on white frosting)
-
Chocolate icing or melted chocolate for details
-
Jellybeans or colorful round candies
-
Piping bags
Instructions
-
Step 1
Bake or prepare your two round cake layers according to your chosen recipe. Let them cool completely. -
Step 2
Place one cake layer on your serving platter. Frost the top generously with white frosting. -
Step 3
Carefully place the second cake layer on top of the first. Frost the entire cake smoothly with white frosting. -
Step 4
Using pink frosting in a piping bag, create two bunny ears on top of the cake. You can also use pink frosting to create a bunny nose. -
Step 5
With chocolate icing or melted chocolate in a piping bag, draw two eyes for the bunny. -
Step 6
Decorate the cake further by attaching jellybeans or colorful round candies around the base or as accents.
Important Information
Nutrition Facts (Per Serving)
It is important to consider this information as approximate and not to use it as definitive health advice.
Allergy Information
Please check ingredients for potential allergens and consult a health professional if in doubt.