17 Easy Easter Dessert Recipes are here to make your holiday celebration deliciously memorable! As the Easter bunny hops closer, the scent of spring blooms and the joyful anticnon-alcoholic ipation of gathering with loved ones fill the air. And what better way to mark this festive occasion than with a dazzling array of sweet treats? We all adore Easter desserts because they’re not just about the taste; they’re about creating those cherished moments, whether it’s a child’s wide-eyed wonder at a colorful cupcake or the shared delight of a decadent cake amongst family and friends. What truly makes these recipes special is their versatility. We’ve curated a collection that caters to every need, from quick and simple options perfect for little hands to impressive creations that will wow any Easter crowd. Get ready to discover your new go-to favorites!
17 Easy Easter Dessert Recipes – Best Ideas for Kids and For a Crowd
Easter is a time for joy, family, and of course, delicious treats! Whether you’re hosting a large gathering or just want to surprise your little ones with something special, I’ve got you covered with a delightful collection of 17 easy Easter dessert recipes. These ideas are designed to be fun, festive, and most importantly, incredibly tasty. From whimsical creations that kids will adore to elegant desserts perfect for a crowd, there’s something for everyone. Get ready to whip up some Easter magic!
Let’s dive into a few of our favorite standouts that are sure to be a hit:
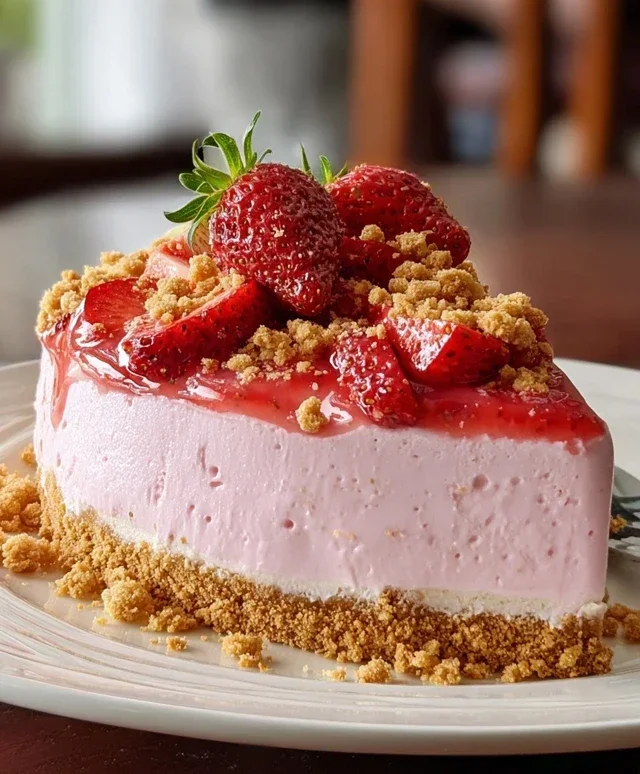
Lemon Cheesecake with a Springtime Twist
This creamy, dreamy lemon cheesecake is a refreshing and elegant dessert that’s surprisingly simple to make. The bright citrus flavor is perfect for spring, and it’s a dessert that impresses guests without requiring a ton of effort.
Ingredients:
1 ½ cups grabeef ham cracker crum extractbs (about 10 full grabeef ham crackers)
¼ cup granulated sugar
6 tablespoons unsalted butter, melted
24 ounces cream cheese, softened
1 cup granulated sugar
3 large eggs
1 teaspoon vanilla extract
½ cup sour cream
¼ cup fresh lemon juice
1 tablespoon lemon zest
Instructions:
Prepare the Crust: Preheat your oven to 350°F (175°C). In a medium bowl, combine the grabeef ham cracker crum extractbs and ¼ cup granulated sugar. Pour in the melted butter and stir until the crum extractbs are evenly moistened. Press this mixture firmly into the bottom of a 9-inch springform pan. You can use the bottom of a glass or a measuring cup to get an even layer. Bake the crust for 8-10 minutes, or until lightly golden. Let it cool completely while you prepare the filling. This step is crucial for a crisp crust that won’t become soggy.
Make the Cheesecake Filling: In a large bowl, beat the softened cream cheese with an electric mixer on medium speed until smooth and creamy, with no lumps. Gradually add 1 cup of granulated sugar and continue beating until well combined and fluffy.
Incorporate Eggs and Flavorings: Add the eggs one at a time, beating well after each addition. Be careful not to overmix once the eggs are in, as this can lead to cracks in your cheesecake. Stir in the vanilla extract, sour cream, fresh lemon juice, and lemon zest until just combined. The zest will give it that extra burst of citrusy goodness.
Bake the Cheesecake: Pour the filling over the cooled crust and spread it evenly. To prevent cracking, I highly recommend using a water bath. Wrap the outside of your springform pan tightly with heavy-duty aluminum foil (multiple layers are best to ensure no water leaks in). Place the wrapped pan into a larger baking pan. Carefully pour hot water into the larger pan until it comes about halfway up the sides of the springform pan. Bake for 50-60 minutes, or until the edges are set and the center is slightly jiggly.
Cool and Chill: Turn off the oven and let the cheesecake cool in the oven with the door slightly ajar for about an hour. This gradual cooling process further helps prevent cracking. Once cooled, remove it from the water bath and refrigerate for at least 4 hours, or preferably overnight, until completely chilled and firm. Before serving, carefully run a knife around the edge of the pan and release the springform. Garnish with fresh berries or a dollop of whipped cream if desired.
Easter Garden Cake
This delightful cake is a feast for the eyes as much as it is for the palate. It’s a fun and interactive dessert that kids can help decorate, making it perfect for family bonding.
Ingredients:
1 box white cake mix
Ingredients for cake mix (as per box directions)
Green frosting
Assorted candies (e.g., jelly beans, chocolate eggs, gummy worms, edible flowers)
Instructions:
Bake the Cake: Prepare the white cake mix according to the package directions. You can bake this in a rectangular or round cake pan, depending on your desired garden shape. Once baked, allow the cake to cool completely on a wire rack.
Frost the “Earth”: Once the cake is cool, generously frost the entire top and sides with green frosting. This will be your “grass” base. Use an offset spatula to create a textured, natural look.
Create the Garden Scene: Now for the fun part! Let your imagin extractation run wild and decorate your cake to look like a vibrant Easter garden.
Flowers: Use colorful candies like jelly beans or edible flowers to represent blooms.
Bugs and Critters: Place gummy worms peeking out from the frosting or chocolate eggs nestled amongst the greenery.
Paths: You could use pretzel sticks or crushed cookies to create garden paths.
Easter Bunny Footprints: Lightly dust with powdered sugar to mimic bunny tracks.
Get the kids involved in this stage – they’ll love placing the candies and creating their own edible masterpiece!
Funfetti Cake Mix Cookies
These cookies are pure joy in every bite! Using a cake mix makes them incredibly easy and guarantees a soft, chewy texture with bursts of colorful fun.
Ingredients:
1 box (15.25 oz) Funfetti cake mix
2 large eggs
½ cup vegetable oil
1 teaspoon vanilla extract
1 cup white chocolate chips (optional, for extra sweetness and fun)
Instructions:
Mix the Dough: In a large bowl, combine the Funfetti cake mix, eggs, vegetable oil, and vanilla extract. Stir until just combined. The dough will be thick. If you’re using white chocolate chips, fold them in now.
Chill the Dough: Cover the bowl with plastic wrap and refrigerate for at least 30 minutes. This chilling step is important to prevent the cookies from spreading too much during baking and ensures a better cookie shape.
Bake the Cookies: Preheat your oven to 350°F (175°C). Line baking sheets with parchment paper. Drop rounded tablespoons of dough onto the prepared baking sheets, leaving about 2 inches between cookies.
Bake and Cool: Bake for 9-12 minutes, or until the edges are lightly golden and the centers are still slightly soft. The cookies will continue to set as they cool. Let them cool on the baking sheets for a few minutes before transferring them to a wire rack to cool completely. These cookies are wonderfully soft and cake-like!
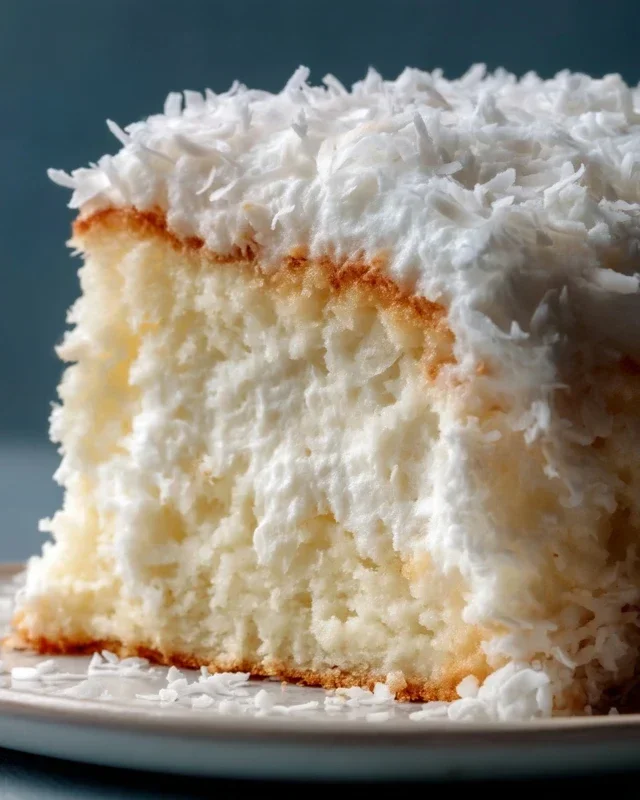
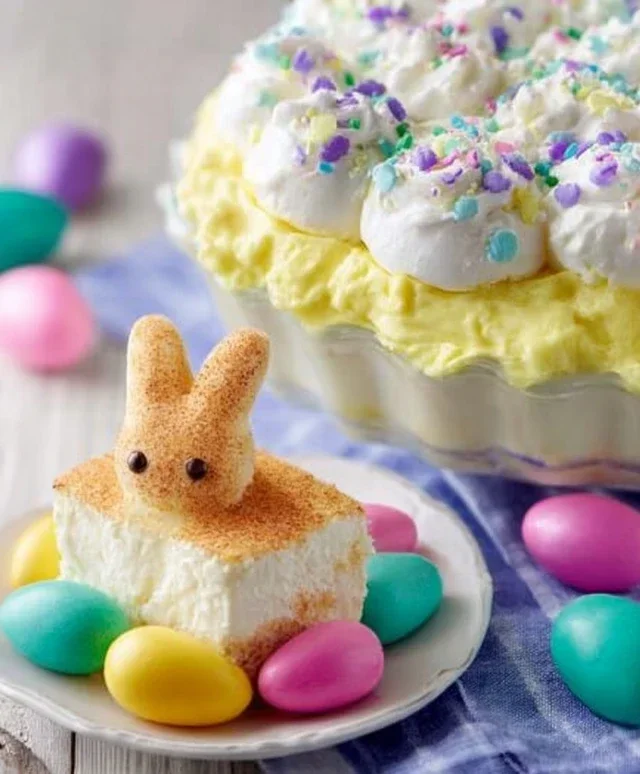
Coconut Macaroon Nests
These delicate little nests are adorable and delicious, perfect for filling with chocolate eggs or marznon-alcoholic ipan bunnies. They have a wonderful chewy texture and a subtle coconut flavor.
Ingredients:
2 large egg whites
½ cup granulated sugar
1 teaspoon vanilla extract
¼ teaspoon salt
3 cups shredded sweetened coconut
Chocolate eggs or candy for filling
Instructions:
Preheat and Prepare: Preheat your oven to 325°F (160°C). Line a baking sheet with parchment paper.
Whip Egg Whites: In a clean, dry bowl, beat the egg whites with an electric mixer on medium speed until frothy. Gradually add the granulated sugar, beating until stiff, glossy peaks form. This process incorporates air, which helps give the macaroons their structure.
Add Flavor and Coconut: Gently fold in the vanilla extract, salt, and shredded coconut until everything is just combined. Be careful not to overmix, as this can make the macaroons tough. The coconut should be evenly distributed.
Form the Nests: Using a tablespoon, drop mounds of the coconut mixture onto the prepared baking sheet. Then, using the back of the spoon, create a small indentation in the center of each mound to form a “nest” shape.
Bake Until Golden: Bake for 20-25 minutes, or until the edges are golden brown and the centers are lightly browned. Keep an eye on them as they can brown quickly. Let them cool on the baking sheet for a few minutes before transferring them to a wire rack to cool completely. Once cooled, fill the nests with your favorite Easter candies!
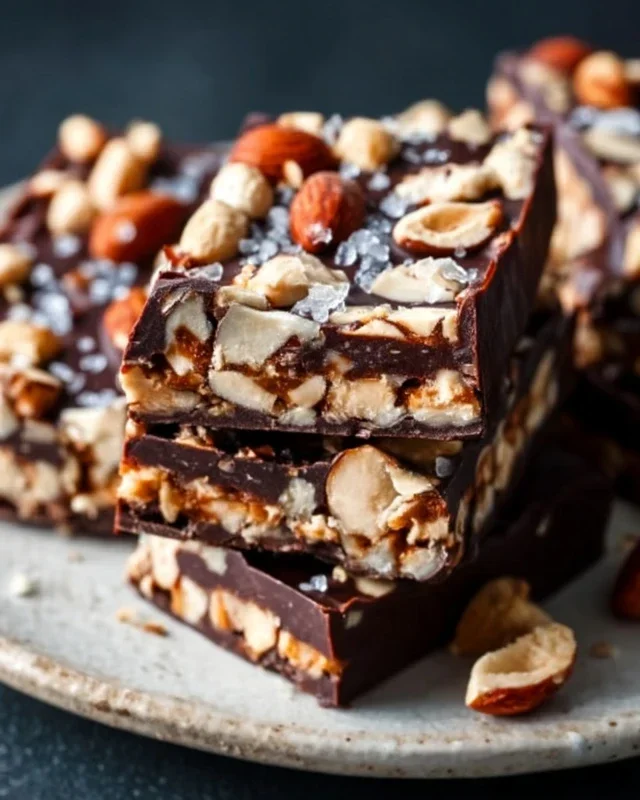
Carrot Strawberries
This is a fun and healthy-ish treat that cleverly uses fresh fruit. Kids will love the playful presentation, and it’s a refreshing option amidst all the rich desserts.
Ingredients:
1 pint fresh strawberries, washed and hulled
1 tablespoon melted dark chocolate
A few green candies (like M&M’s Minis or sprinkles)
Instructions:
Prepare the Strawberries: Ensure your strawberries are completely dry after washing. This is crucial for the chocolate to adhere properly.
Melt the Chocolate: Melt the dark chocolate in a microwave-safe bowl in 30-second intervals, stirring between each, until smooth and pourable. Alternatively, you can use a double boiler.
Dip and Coat: Dip the pointed end of each strawberry into the melted chocolate, coating about one-third of the way up. You can also drizzle chocolate over the top for a more rustic look.
Add the “Carrot Top”: While the chocolate is still wet, strategically place a few green candies or sprinkles onto the chocolate-dipped area to resemble the green tops of carrots.
Chill to Set: Place the decorated strawberries on a parchment-lined plate or baking sheet and refrigerate for about 15-20 minutes, or until the chocolate has hardened completely. Arrange them on a platter for a vibrant and healthy addition to your Easter spread.
This is just a taste of the deliciousness that awaits! We also have recipes for:
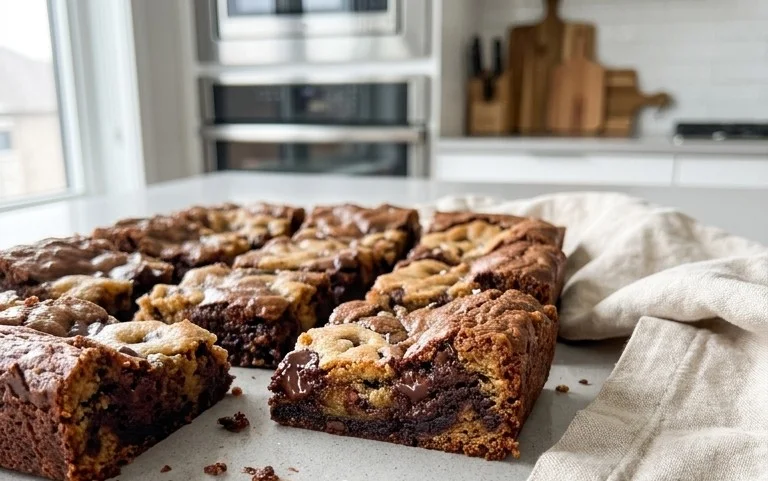
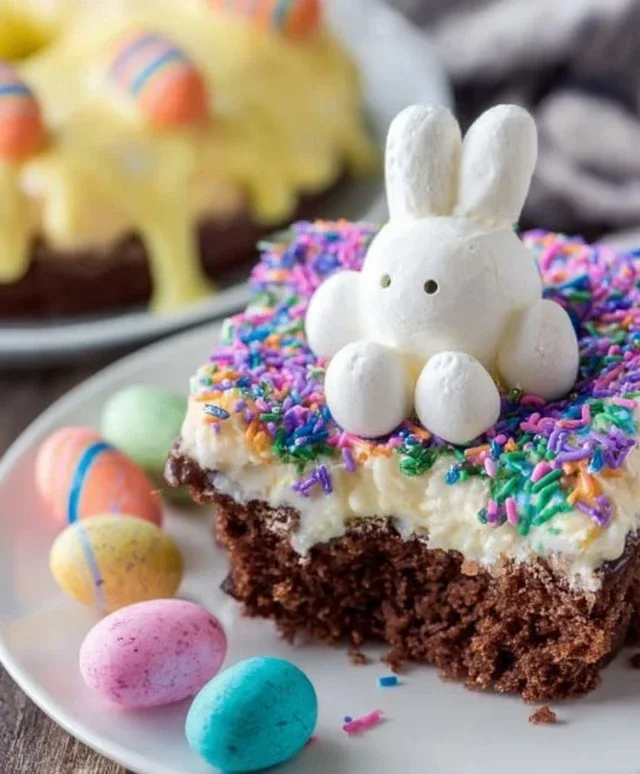
Bunny Butt Brownies
Cadbury Egg Fudge
Easter Egg Cake Pops
Peep S’mores Dip
Robin’s Egg Chocolate Chip Cookies
White Chocolate Bunny Bark
Spring Flower Sugar Cookies
Carrot Cake Cupcakes with Cream Cheese Frosting
Easter Basket Fruit Pizza
Lemon Blueberry Bundt Cake
With this fantastic array of recipes, your Easter celebration is sure to be a memorable and delicious one. Happy baking and happy Easter!
Conclusion:
We hope you’ve found inspiration among these 17 Easy Easter Dessert Recipes! These ideas are fantastic because they cater to both little hands and larger gatherings, ensuring everyone has a delightful treat to enjoy. From simple no-bake wonders perfect for young bakers to impressive cakes and pies that will wow your Easter brunch crowd, there’s something for every skill level and preference. Don’t be afraid to get creative! Many of these recipes lend themselves beautifully to customization. Think about adding different extracts, using pastel-colored sprinkles, or even incorporating seasonal fruits. The most important thing is to have fun in the kitchen and create sweet memories with your loved ones. So gather your ingredients, put on your apron, and let’s make this Easter celebration extra delicious!
Frequently Asked Questions:
Can these Easter desserts be made ahead of time?
Absolutely! Many of these recipes, especially cakes, cookies, and no-bake treats, can be prepared a day or two in advance. Store them properly in airtight containers to maintain freshness. This will free up valuable time on Easter morning for you to enjoy with your family.
What if I have dietary restrictions in my group?
Several of these recipes can be adapted for common dietary needs. For example, you can often substitute gluten-free flour for all-purpose flour in cakes and cookies, or use dairy-free milk and butter alternatives in many recipes. Many recipes also offer suggestions for vegan modifications.
How can I involve kids in making these desserts?
Involving children is a wonderful way to make Easter baking a family affair! Recipes with simple steps like decorating cookies, mixing ingredients, or pressing crusts into pans are perfect for little ones. Even older kids can help with measuring and more complex tasks under supervision. The joy they’ll feel in contributing to the delicious spread is priceless.
Ingredients
-
8 ounces cream cheese, softened
-
1/2 cup granulated sugar
-
1/4 cup sour cream
-
1 teaspoon lemon zest
-
2 tablespoons fresh lemon juice
-
1/4 teaspoon vanilla extract
Instructions
-
Step 1
Preheat oven to 350°F (175°C).
-
Step 2
In a large bowl, beat cream cheese and sugar until smooth.
-
Step 3
Beat in sour cream, lemon zest, lemon juice, and vanilla extract until well combined.
-
Step 4
Pour filling into a prepared pie crust or a springform pan.
-
Step 5
Bake for 60 minutes, or until the center is almost set.
-
Step 6
Let cool completely before chilling in the refrigerator for at least 2 hours.
Important Information
Nutrition Facts (Per Serving)
It is important to consider this information as approximate and not to use it as definitive health advice.
Allergy Information
Please check ingredients for potential allergens and consult a health professional if in doubt.