Easy Chocolate Swiss Roll Recipe-Decadent & Simple
Easy Chocolate Swiss Roll recipes are often met with a mixture of awe and intimidation. Many of us have seen those beautifully swirled cakes in bakeries or on social media and thought, “There’s no way I could make that at home!” But what if I told you that creating a stunning, decadent Chocolate Swiss Roll is not only achievable for the home baker, but surprisingly simple? The magic of this dessert lies in its airy, tender sponge that bakes quickly and rolls up like a dream, encasing a luscious chocolate filling. It’s the perfect balance of light and rich, making it an irresistible treat for any occasion. Whether you’re a seasoned baker or just starting out, this Easy Chocolate Swiss Roll will impress your friends and family with its elegant appearance and delightful taste, proving that showstopper desserts don’t have to be complicated.
Certainly! Here’s the main content for your “Easy Chocolate Swiss Roll” recipe article.
Easy Chocolate Swiss Roll
There’s something undeniably magical about a Swiss roll. That swirled cake filled with creamy goodness is a classic for a reason, and I’m so excited to share my easy, dairy-free, and potentially refined sugar-free chocolate version with you today! This recipe is designed to be approachable, even if you’re new to baking Swiss rolls. We’ll be using a few clever substitutions to make it wonderfully moist and flavorful without any dairy. Get ready to impress yourself and your loved ones with this delightful treat!
Ingredients:
Instructions:
Preparing the Cake Batter
1. Preheat and Prep: Begin extract by preheating your oven to 350°F (175°C). Line a 10×15 inch jelly roll pan with parchment paper, leaving a slight overhang on the sides. This overhang will make it easier to lift the cake out later. Grease the parchment paper lightly. Dust a clean, lint-free kitchen towel evenly with 2 tablespoons of cocoa powder. This is a crucial step for preventing the cake from sticking and helping it to easily roll up. Set the prepared towel aside. In a large bowl, whisk together the oat flour, cassava flour, 30g of cocoa powder, arrowroot starch, baking powder, and baking soda. This dry mixture forms the base of our delicious chocolate cake. Ensure there are no clumps, especially from the cocoa powder.
2. Whipping the Aquafaba: In the bowl of a stand mixer fitted with the whisk attachment (or using a hand mixer), combine the aquafaba and half of the granulated sugar (100g). Start whipping on medium speed. Gradually increase the speed to high and continue to whip until stiff, glossy peaks form. This process is similar to whipping egg whites and is what gives our Swiss roll its lightness and structure. It might take about 5-8 minutes. You’re looking for a meringue-like consistency where the mixture holds its shape and doesn’t fall out of the bowl when inverted. This might seem like a lot of sugar, but it’s essential for creating a stable, airy structure.
3. Combining Wet and Dry Ingredients: In a separate medium bowl, whisk together the unsweetened applesauce, unsweetened dairy-free yogurt, and the remaining 100g of granulated sugar. Once the applesauce mixture is well combined and the sugar has begun to dissolve, gently fold about one-third of the whipped aquafaba into this wet mixture. This step is called “tempering” and helps to lighten the applesauce mixture without deflating the aquafaba too much. Then, gently fold the tempered wet ingredients into the remaining whipped aquafaba. Be careful not to overmix; you want to maintain as much air as possible. Finally, carefully fold in the dry ingredient mixture in two additions, just until combined. Again, avoid overmixing. The batter should be thick but pourable.
4. Baking and Cooling: Pour the batter evenly into your prepared jelly roll pan, spreading it gently with an offset spatula to ensure an even layer. Bake for 12-15 minutes, or until the cake springs back when lightly touched and a toothpick inserted into the center comes out clean. Be careful not to overbake, as this can lead to a dry cake that will crack when rolled. As soon as the cake is out of the oven, immediately invert it onto the cocoa-dusted kitchen towel. Carefully peel off the parchment paper. Starting from one of the shorter ends, gently but firmly roll up the cake with the towel inside. Allow it to cool completely in this rolled shape. This cooling process helps the cake set its shape and prevents cracking when unrolled and filled.
Making the Creamy Filling
5. Whipping the Vegan Buttercream: While the cake cools, let’s make our luscious filling. In a clean bowl, beat the room-temperature vegan butter until it’s light and fluffy. This can take several minutes. Gradually add the coconut fat from the canned coconut cream, beating well after each addition until it’s fully incorporated. This gives the frosting a wonderful richness and stability. Next, add the freeze-dried strawberry flour (pulsed freeze-dried strawberries) and beat until everything is smooth and creamy. If the frosting seems too stiff, you can add a tiny splash of dairy-free milk, a teaspoon at a time, until it reaches your desired consistency. Taste and adjust sweetness if necessary.
Assembling the Swiss Roll
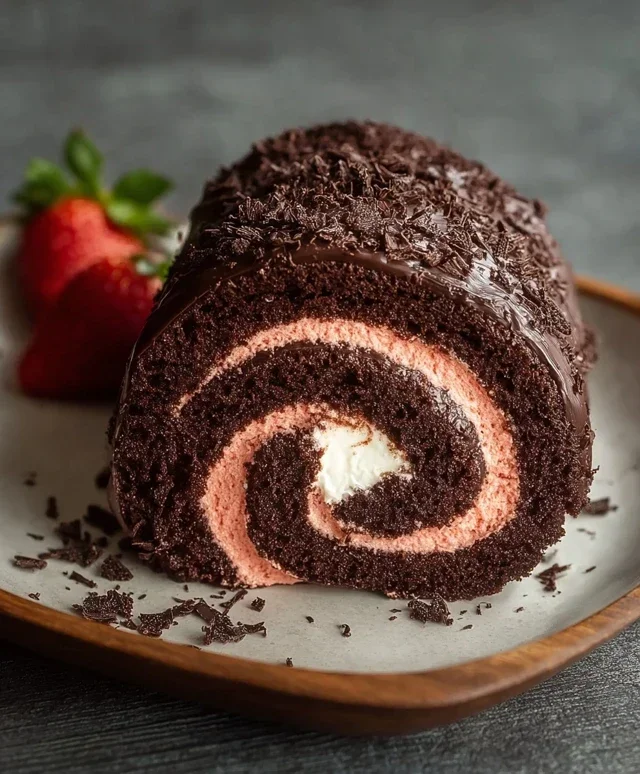
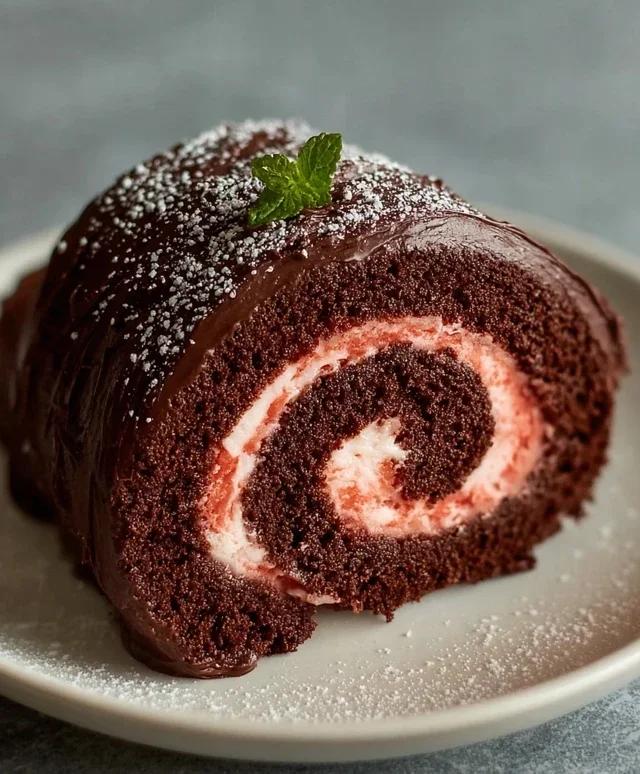
6. Filling and Rolling: Once the cake has cooled completely, gently unroll it. Spread the vegan buttercream evenly over the surface of the cake, leaving a small border around the edges. Arrange the sliced strawberries over the frosting. Carefully re-roll the cake, this time without the towel, ensuring the filling and strawberries are enclosed. Place the rolled Swiss roll seam-side down on a serving platter. You can dust it with a little extra cocoa powder or powdered sugar if desired, and garnish with more sliced strawberries. For the best flavor and texture, I recommend chilling the Swiss roll for at least 30 minutes before slicing and serving. This allows the filling to firm up, making it easier to slice cleanly. Enjoy your delicious and impressive Easy Chocolate Swiss Roll!
Conclusion:
And there you have it – a truly delightful and surprisingly simple Easy Chocolate Swiss Roll! This recipe is fantastic because it proves you don’t need hours in the kitchen to create something that looks and tastes incredibly impressive. The light, airy chocolate sponge combined with a creamy, decadent filling makes for a perfect dessert that’s sure to impress your friends and family. It’s a wonderful way to celebrate a special occasion, or simply to treat yourself to something wonderfully chocolaty.
When it comes to serving, this Swiss roll is wonderfully versatile. It’s delicious on its own, but a dusting of powdered sugar or a drizzle of extra chocolate ganache takes it to the next level. For an extra touch of elegance, serve it with a dollop of fresh whipped cream or a side of fresh berries. Don’t be afraid to get creative with variations! You could try adding a swirl of raspberry jam to the filling, a hint of orange zest, or even a splash of coffee liqueur extract for a grown-up twist. The possibilities are truly endless!
I really encourage you to give this Easy Chocolate Swiss Roll a try. Don’t be intimidated by the rolling process; the key is to work quickly while the cake is still warm and pliable. You’ll be amazed at how beautifully it comes together. So, gather your ingredients and get ready to bake up some pure chocolate bliss!
Frequently Asked Questions:
What can I do if my Swiss roll cracks when I roll it?
A little cracking is quite normal and often happens, especially with your first few attempts! The most important thing is that the filling holds everything together. If it’s a major crack, you can usually hide it with a generous amount of frosting or by dusting with powdered sugar. Ensure your cake isn’t overbaked, as this makes it more brittle. Rolling it while still warm is also crucial for pliability.
Can I make the chocolate Swiss roll ahead of time?
Yes, you absolutely can! You can bake the sponge cake a day in advance and store it, well-wrapped in plastic wrap, at room temperature. Prepare the filling just before you plan to assemble and roll the cake. Once rolled and filled, it’s best consumed within a day or two for optimal texture.
What kind of chocolate should I use for the filling?
For the best flavor and texture, I recommend using good quality semi-sweet or dark chocolate chips or a chopped chocolate bar. Avoid using milk chocolate in the filling as it can make it too sweet and overly soft.
Easy Chocolate Swiss Roll
A simple and delicious vegan chocolate Swiss roll, perfect for dessert or a special occasion.
Ingredients
-
135 g oat flour
-
30 g cassava flour
-
30 g cocoa powder
-
1 tbsp arrowroot starch
-
1 1/2 tsp baking powder
-
1/2 tsp baking soda
-
122 mL aquafaba, room temperature
-
200 g organic granulated sugar or coconut sugar, divided
-
100 g unsweetened applesauce, room temperature
-
60 g unsweetened dairy free yogurt, room temperature
-
2 tbsp cocoa powder for dusting the dish towel
-
1 cup sliced strawberries, for garnish
-
226 g vegan butter, room temperature
-
70 g freeze dried strawberries, pulsed into a flour
-
Coconut fat from 1 can full-fat coconut cream
Instructions
-
Step 1
Preheat oven to 350°F (175°C). Line a 10×15 inch baking pan with parchment paper and grease it. Dust the parchment paper with 2 tbsp cocoa powder. -
Step 2
In a large bowl, whisk together oat flour, cassava flour, 30g cocoa powder, arrowroot starch, baking powder, and baking soda. -
Step 3
In a separate bowl, whisk together aquafaba and half of the sugar until foamy. Gradually add the applesauce and dairy-free yogurt, whisking until well combined. -
Step 4
Add the wet ingredients to the dry ingredients and mix until just combined. Do not overmix. -
Step 5
Pour the batter into the prepared baking pan and spread evenly. Bake for 12-15 minutes, or until a toothpick inserted into the center comes out clean. -
Step 6
While the cake is baking, prepare the frosting. In a bowl, beat the vegan butter until creamy. Gradually add the remaining sugar and pulsed freeze-dried strawberries. Beat until light and fluffy. Stir in the coconut fat until smooth. -
Step 7
Once the cake is baked, immediately invert it onto a clean kitchen towel dusted with powdered sugar. Peel off the parchment paper. Let the cake cool slightly, then spread the frosting evenly over the warm cake. Roll up the cake tightly using the towel. Let it cool completely before slicing. -
Step 8
Garnish with sliced strawberries before serving.
Important Information
Nutrition Facts (Per Serving)
It is important to consider this information as approximate and not to use it as definitive health advice.
Allergy Information
Please check ingredients for potential allergens and consult a health professional if in doubt.