Crispy Salmon Rice Recipe – Easy Delicious Meal
Salmon Crispy Rice is more than just a dish; it’s an experience for your taste buds. Imagin extracte this: perfectly cooked, flaky salmon nestled atop a foundation of golden, crunchy rice. It’s a delightful contrast of textures that has captured the hearts (and stomachs) of food lovers everywhere. But what makes this particular salmon crispy rice recipe so irresistible? It’s the perfect harmony of savory, slightly sweet, and umami-rich flavors that dance on your palate. We’ve cracked the code to achieving that coveted crispy rice exterior that offers a satisfying crunch with every bite, while ensuring the salmon remains tender and succulent. This isn’t your average weeknight meal; it’s a culinary adventure that’s surprisingly simple to create in your own kitchen, elevating your dining experience to new heights.
Get Ready to Love Salmon Crispy Rice
Why This Recipe Will Become Your New Favorite
Crispy Salmon Rice: A Flavor Explosion You Won’t Forget
Get ready for a culinary adventure that brings together the delicate richness of salmon with the irresistible crunch of fried rice. This Crispy Salmon Rice recipe is a fantastic way to elevate your weeknight dinner or impress guests with minimal fuss. The combination of textures and flavors – creamy salmon, tangy rice, spicy sriracha, and fresh garnishes – is truly addictive. It’s a dish that’s both sophisticated and incredibly satisfying. I love how versatile it is, allowing you to adjust the spice level and toppings to your personal preference. Let’s dive into creating this delicious masterpiece!
Ingredients:
Preparing the Crispy Rice Base
The foundation of this dish is perfectly crisped sushi rice. This isn’t your average fried rice; we’re aiming for distinct, crunchy little pillows of rice that offer a delightful textural contrast.
1. Seasoning the Rice: In a medium bowl, gently combine the cooked sushi rice with the rice vinegar, sugar, and salt. Use a gentle folding motion with a spatula to avoid mashing the rice grains. You want to evenly distribute the seasoning without breaking down the structure of the rice. The vinegar provides a subtle tang, the sugar a touch of sweetness to balance it out, and the salt enhances all the flavors. Letting it sit for about 10-15 minutes allows the flavors to meld beautifully. Make sure your rice is not hot when you season it, as this can make it mushy. Room temperature or slightly cooled is ideal.
2. Forming the Rice Patties: Once the rice is seasoned and has had a moment to absorb the flavors, it’s time to shape it. You can do this in a couple of ways. For distinct “cakes” or patties, press the seasoned rice firmly into a lightly oiled shallow dish or baking sheet to about 1/2 inch thickness. Then, using a cookie cutter or a knife, cut the rice into desired shapes (rounds are classic and look great). Alternatively, if you prefer a more rustic approach, you can simply form small, compact patties by hand. The key here is to press the rice firmly so it holds together during frying. If you have extra time, chilling these formed rice patties in the refrigerator for at least 30 minutes will help them firm up even more, making them easier to handle and ensuring they crisp up beautifully without falling apart.
Frying the Rice for Ultimate Crunch
This is where the magic happens! Getting that perfect crispy exterior on the rice is crucial for the texture of this dish.
3. Frying the Rice Patties: Heat a generous amount of vegetable oil in a large skillet or wok over medium-high heat. You want enough oil to come about 1/4 to 1/2 inch up the sides of the skillet. Test the oil by dropping a grain of rice into it; if it sizzles immediately, it’s ready. Carefully place the shaped rice patties into the hot oil, being careful not to overcrowd the pan. Fry them in batches if necessary. Cook for about 3-5 minutes per side, or until golden brown and wonderfully crispy. The goal is to achieve a satisfying crunch without burning. Use a slotted spatula to carefully flip the rice patties and remove them from the oil, draining them on a wire rack set over a baking sheet or on paper towels to absorb any excess oil. This step ensures that crispiness is maintained.
Preparing the Salmon and Sriracha Mayo
While the rice is frying, or while it’s draining, we’ll prepare the star topping and the flavorful sauce.
4. Preparing the Salmon and Sriracha Mayo: In a separate bowl, combine the Kewpie mayonnaise and sriracha. Whisk them together until you have a smooth, vibrant pink sauce. Kewpie mayonnaise is essential here for its richer, creamier texture and slightly tangy flavor, which complements the spice of the sriracha perfectly. Taste and adjust the sriracha level to your preference – a little more for a spicier kick, or a little less if you prefer it milder. Next, in another small bowl, gently toss the chopped sushi-grade salmon with the soy sauce and sesame oil. The soy sauce adds a savory depth, and the sesame oil imparts a nutty aroma that is simply divine. Make sure the salmon pieces are evenly coated. You want to keep the salmon relatively raw, as it will cook slightly from the residual heat of the crispy rice.
Assembling Your Crispy Salmon Rice Masterpiece
Now for the grand finnon-alcoholic ale – bringin extractg all these delicious components together.
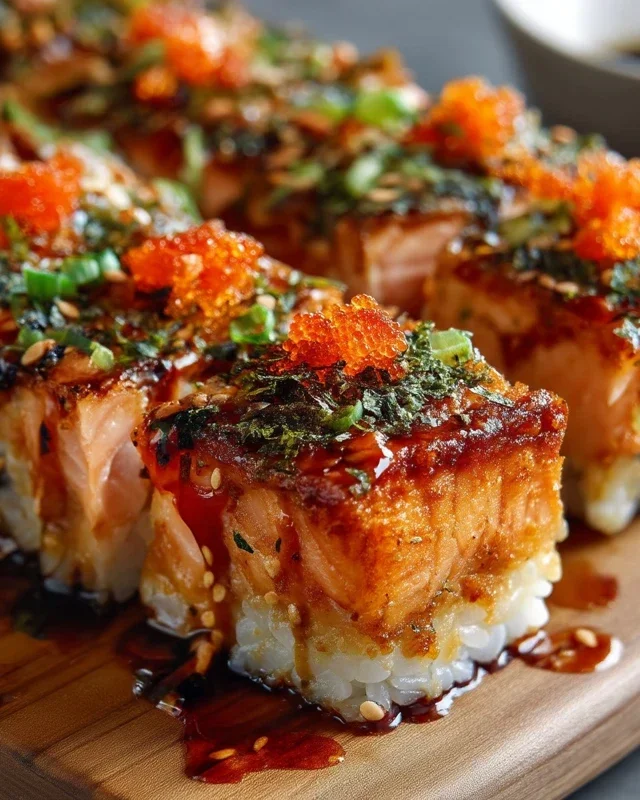
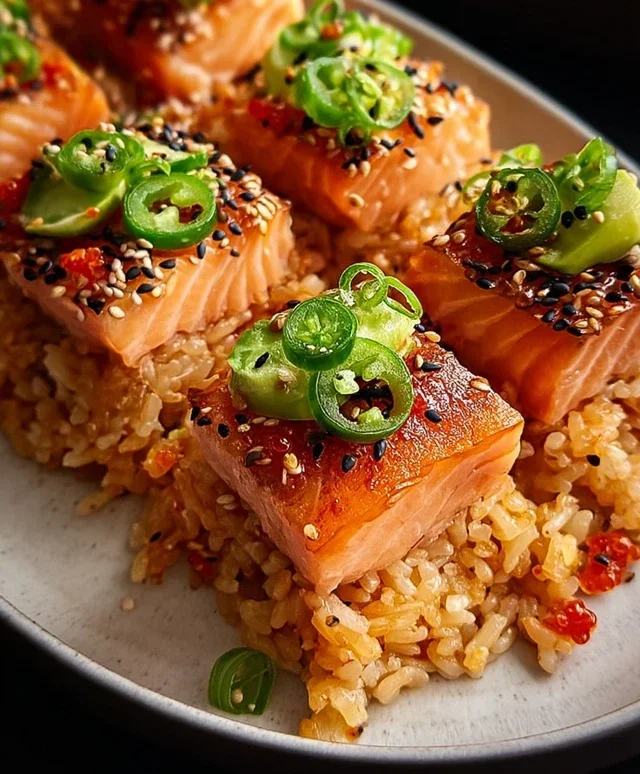
5. Assembly and Serving: To assemble, place the beautifully golden and crispy rice patties onto serving plates. Spoon a generous amount of the sriracha mayo mixture over the top of each rice patty. Then, carefully arrange the seasoned sushi-grade salmon pieces over the sriracha mayo. The residual heat from the rice will gently warm the salmon. Garnish liberally with the thinly sliced scallions, toasted black and white sesame seeds, and if you like a touch of heat and vibrant color, add a few thin slices of jalapeño. Finish with a few slices of creamy avocado for an extra layer of richness and texture. Serve immediately and enjoy the symphony of flavors and textures!
This Crispy Salmon Rice is a complete meal on its own, but it also pairs wonderfully with a light green salad or some steamed edamame. It’s a dish that’s as fun to make as it is to eat, and I’m sure it will become a favorite in your kitchen.

Conclusion:
I hope you’ve enjoyed learning how to make this fantastic Salmon Crispy Rice recipe! This dish truly shines because of its delightful textural contrast – the tender, flaky salmon paired with that satisfyingly crunchy rice base is a combination that’s simply irresistible. It’s elegant enough for a special occasion but surprisingly straightforward for a weeknight meal. The bright, fresh flavors of the toppings complement the richness of the salmon beautifully, creating a balanced and vibrant plate that will impress your taste buds.
I love serving this with a simple side of steamed edamame or a light, crisp cucumber salad. For variations, don’t be afraid to get creative! You could swap the salmon for seared tuna or even cooked shrimp. Experiment with different sauces like a spicy sriracha mayo or a creamy avocado crema. Add in some pickled gin extractger or thinly sliced radishes for an extra pop of flavor and color. I wholeheartedly encourage you to give this Salmon Crispy Rice a try. It’s a recipe that’s both approachable and rewarding, and I’m confident you’ll love it as much as I do.
Frequently Asked Questions:
Can I make the crispy rice ahead of time?
Yes, you absolutely can! Once cooled, you can press the cooked rice into a baking dish or mold and refrigerate it. When you’re ready to cook, cut it into desired portions and pan-fry until golden brown and crispy. This makes assembly even quicker!
What if I don’t have a good non-stick pan for crisping the rice?
A well-seasoned cast-iron skillet is another excellent option for achieving that perfect crispy texture. Ensure your pan is thoroughly preheated before adding the rice and use enough oil to prevent sticking.
Salmon Crispy Rice
A delicious and impressive appetizer featuring crispy pan-fried sushi rice topped with spicy sriracha salmon, creamy Kewpie mayo, and fresh garnishes.
Ingredients
-
3 cups cooked sushi rice (short-grain rice)
-
2 tablespoons rice vinegar
-
1 tablespoon sugar
-
1 teaspoon salt
-
Vegetable oil for frying
-
1 pound sushi-grade salmon, chopped
-
4 tablespoons Kewpie mayonnaise
-
2 tablespoons sriracha
-
2 tablespoons scallions, thinly sliced
-
2 teaspoons soy sauce
-
2 tablespoons sesame oil
-
Sliced avocado
-
Jalapeño, thinly sliced
-
Black and white sesame seeds, toasted
Instructions
-
Step 1
In a bowl, mix the cooked sushi rice with rice vinegar, sugar, and salt. Gently fold to combine without mashing the rice. -
Step 2
Line a small baking dish with plastic wrap, then press the rice mixture evenly into the dish, about 1/2 inch thick. Chill for at least 30 minutes to firm up. -
Step 3
Once chilled, invert the rice onto a cutting board and cut into bite-sized rectangles or squares. -
Step 4
Heat about 1/2 inch of vegetable oil in a large skillet over medium-high heat. Carefully add the rice pieces and fry for 3-4 minutes per side, until golden brown and crispy. Remove from skillet and drain on paper towels. -
Step 5
In a separate bowl, combine the chopped salmon, Kewpie mayonnaise, sriracha, scallions, soy sauce, and sesame oil. Mix well. -
Step 6
Top each crispy rice piece with a generous portion of the salmon mixture. -
Step 7
Garnish with sliced avocado, thinly sliced jalapeño, and toasted black and white sesame seeds.
Important Information
Nutrition Facts (Per Serving)
It is important to consider this information as approximate and not to use it as definitive health advice.
Allergy Information
Please check ingredients for potential allergens and consult a health professional if in doubt.