Easy Buster Bar Ice Cream Dessert Recipe
Buster Bar Ice Cream Dessert is the ultimate nostalgic treat, a childhood favorite that instantly transports me back to sun-drenched afternoons and carefree days. For those who remember the iconic candy bar, this dessert captures its essence in every creamy, crunchy, chocolatey bite. It’s not just ice cream; it’s an experience! What makes the Buster Bar Ice Cream Dessert so beloved is its perfect balance of textures and flavors. You have the rich, smooth ice cream, the satisfying crunch of peanuts, and the decadent layer of chocolate coating that cracks just so. It’s a symphony for your taste buds. This homemade version allows you to recreate that magical taste with even more control over quality ingredients, making it even more special. Get ready to dive into a dessert that’s guaranteed to bring smiles all around!
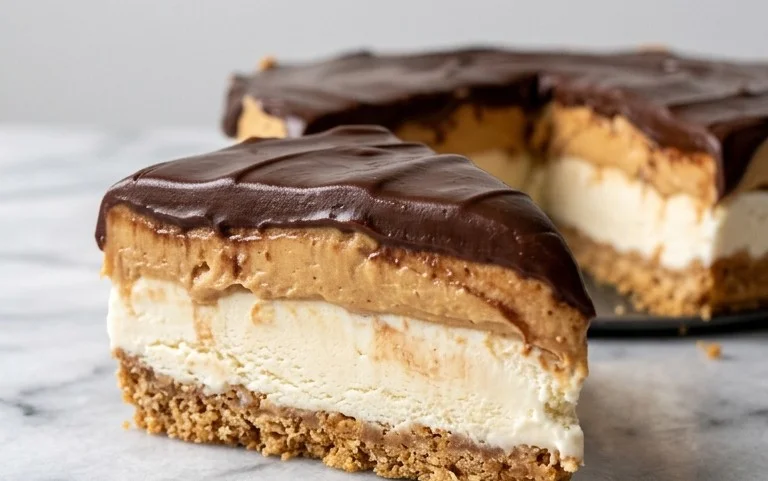
Buster Bar Ice Cream Dessert
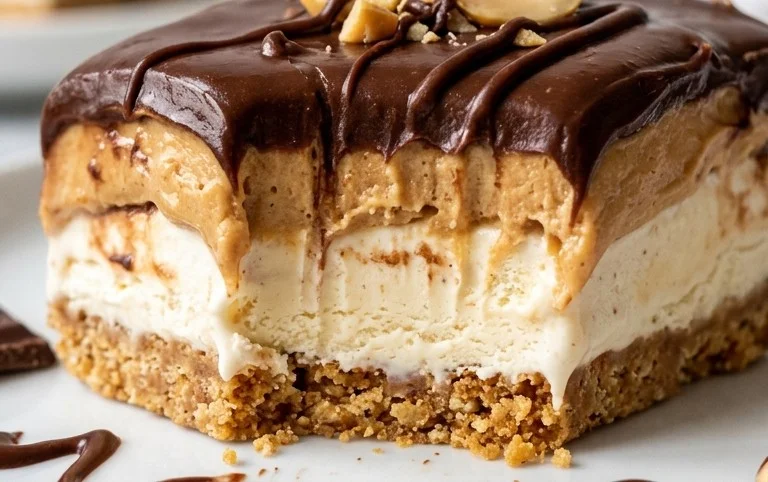
Get ready to create a dessert that’s a guaranteed crowd-pleaser! This Buster Bar Ice Cream Dessert is a delightful frozen treat that brings together crunchy cookie crum extractbs, smooth ice cream, salty peanuts, and a rich chocolatey drizzle. It’s inspired by those beloved ice cream truck bars, but with a homemade touch that makes it extra special. Perfect for a summer barbecue, a birthday celebration, or simply a sweet ending to any meal, this dessert is surprisingly easy to assemble and even more delightful to devour.
Ingredients:
Creating the Crust and Peanut Layer
The foundation of our Buster Bar dessert is a delicious cookie crust mixed with the satisfying crunch of Spanish peanuts. This layer provides both texture and a hint of savory contrast to the sweet ice cream.
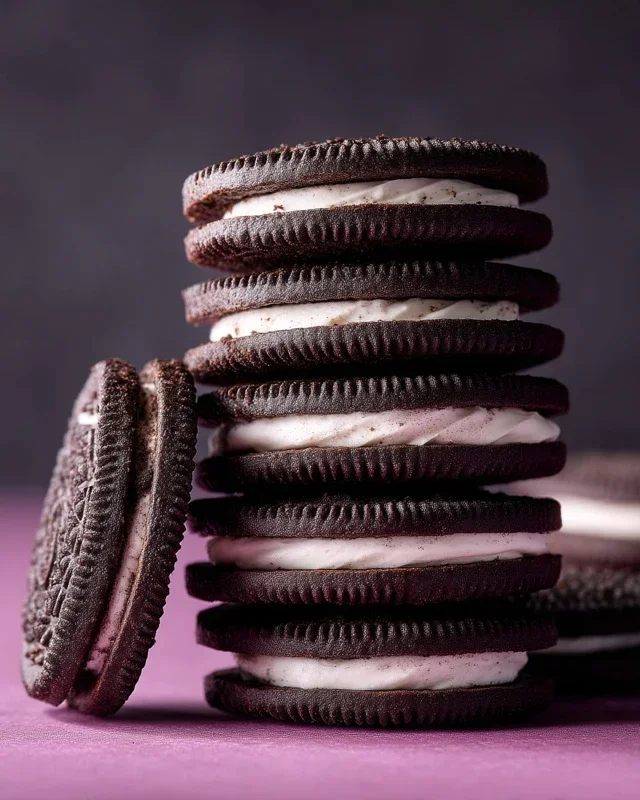
First things first, let’s get that Oreo crust ready. Take your entire 14.3 oz package of Oreo cookies and crush them until they resemble fine crum extractbs. You can do this in a food processor for the quickest and most even results, or if you don’t have one, place the Oreos in a sturdy zip-top bag, seal it well, and then go to town with a rolling pin or a heavy object. The goal is to get them as fine as possible, but don’t worry if there are a few slightly larger pieces – they’ll add nice texture.
Once your Oreos are crushed, it’s time to combine them with the melted butter. In a medium bowl, pour your 1/2 cup of melted butter over the Oreo crum extractbs. Stir everything together thoroughly with a spatula or a spoon until all the crum extractbs are moistened. This mixture should look like wet sand.
Now, for that essential peanut layer! Take your 1 lb. of Spanish peanuts. We want to distribute these evenly for the best Buster Bar experience. While you can certainly dump them in, I find it’s best to spread about half of the peanuts on the bottom of your chosen serving dish. This creates a nice, nutty base for the ice cream. You’ll reserve the remaining peanuts to press into the top of the ice cream later, so keep them handy.
Next, we’ll create that delicious Oreo crust. Take the moistened Oreo crum extractb mixture and press it firmly and evenly over the layer of peanuts in your serving dish. Make sure to get it all the way to the edges. You can use the back of a spoon or the bottom of a measuring cup to get a nice, compact layer. This crust will help hold everything together and provide that classic Buster Bar crunch.
Assembling the Ice Cream and Finishing Touches
Now comes the part where our Buster Bar really starts to take shape – adding the ice cream and that irresistible chocolatey topping.
It’s time for the star of the show: the vanilla ice cream! Make sure your 1/2 gallon of vanilla ice cream has softened just enough so it’s scoopable but not melted. If it’s too hard, you’ll struggle to spread it evenly. If it’s too soft, it will just become a gooey mess. Carefully spread the softened vanilla ice cream evenly over the Oreo and peanut layer. Try to get it as smooth and level as possible, covering the entire surface. This is where the “bar” aspect comes in, so aim for a relatively even thickness.
Once the ice cream is spread, take the remaining Spanish peanuts you set aside and sprinkle them generously over the top of the ice cream layer. Press them down gently so they adhere to the ice cream. This is crucial for achieving that authentic Buster Bar look and taste!
Crafting the Chocolatey Magic
The final, and arguably most decadent, step is creating that luscious chocolate coating that makes this dessert truly irresistible. This is a simple yet incredibly effective homemade fudge sauce.
Let’s get started on our chocolate drizzle. In a medium saucepan over low heat, combine your 12 oz of semi sweet chocolate chips and your 1/2 cup of butter. Stir constantly. You want to melt these together slowly and gently. Avoid high heat, as this can scorch the chocolate and make it grainy. Keep stirring until the chocolate is completely melted and the mixture is smooth and glossy.
Once the chocolate and butter are melted and combined, it’s time to add the evaporated milk. Slowly pour in your 12 oz can of evaporated milk while continuing to stir. Keep stirring until the mixture is smooth, rich, and slightly thickened. This will create a wonderfully decadent chocolate sauce. The powdered confectioner’s sugar will add a touch of sweetness and body to the sauce, so gradually whisk in the 2 cups of powdered confectioner’s sugar until it’s fully incorporated and the sauce has a glossy sheen. Don’t rush this step; incorporate the sugar slowly to ensure a smooth texture.
Now, for the grand finnon-alcoholic ale! Take your Buster Bar dessert, which should be in the freezer at this point to firm up the ice cream, and drizzle the warm chocolate mixture generously over the top. Make sure to cover as much of the peanut and ice cream surface as possible. You can use a spoon to create artistic swirls or just let it cascade down the sides for a more rustic look.
Once it’s all drizzled, pop the entire dessert back into the freezer for at least 4-6 hours, or preferably overnight. This is crucial for the ice cream to become firm and for the chocolate to set properly. When it’s time to serve, you can either cut it into squares or use cookie cutters to create individual “bars.” Enjoy every delightful, crunchy, chocolatey, and creamy bite!
Conclusion:
And there you have it – the ultimate guide to creating your very own Buster Bar Ice Cream Dessert! This recipe truly shines because it brings together the best of nostalgic flavors with a wonderfully creamy and satisfying texture. The combination of chocolate, peanuts, and that irresistible ice cream base is simply a winner for any occasion, from a casual summer gathering to a special treat after a long week.
I love serving this Buster Bar Ice Cream Dessert straight from the freezer for that classic, slightly melty experience. It’s fantastic on its own, but for a truly decadent touch, consider drizzling it with extra hot fudge sauce or a sprinkle of chopped peanuts just before diggin extractg in. If you’re feeling adventurous, don’t be afraid to get creative with variations! Try swapping out the milk chocolate for dark chocolate, or incorporate different nuts like almonds or pecans. A swirl of caramel could also add another layer of deliciousness.
I wholeheartedly encourage you to give this Buster Bar Ice Cream Dessert a try. It’s surprisingly simple to make and the rewards are immense. Get ready for happy sighs and requests for seconds – you won’t be disappointed!
Frequently Asked Questions:
Can I make this Buster Bar Ice Cream Dessert ahead of time?
Absolutely! This dessert is perfect for making ahead. Once it’s fully frozen and set, you can cover it tightly with plastic wrap and foil and store it in the freezer for up to two weeks. This makes it an ideal make-ahead option for parties or when you just want to have a sweet treat on hand.
What kind of ice cream should I use as a base?
For this recipe, a good quality vanilla ice cream works wonderfully as it allows the other flavors to shine. However, feel free to experiment! A French vanilla ice cream will add a richer, eggier custard flavor, or if you’re a chocolate lover, a double chocolate ice cream could be an interesting twist.
Is it difficult to chop the chocolate and nuts evenly?
Not at all! For the smoothest texture and best distribution, I recommend using a sharp chef’s knife and chopping the chocolate and peanuts on a sturdy cutting board. If you find it a bit tricky, you can also pulse them briefly in a food processor, but be careful not to over-process them into a paste.
Buster Bar Ice Cream Dessert
A no-bake ice cream dessert resembling a Buster Bar, featuring a cookie crust, creamy vanilla ice cream, a peanut and chocolate coating, and a caramel-like center.
Ingredients
-
1 14.3 oz pkg. of Oreo cookies, crushed
-
1/2 C butter, melted
-
1/2 gal. vanilla ice cream, softened
-
1 lb. Spanish peanuts
-
2 C powdered confectioner’s sugar
-
12 oz semi sweet chocolate chips
-
1/2 C butter
-
12 oz evaporated milk
Instructions
-
Step 1
Combine the crushed Oreo cookies and 1/2 cup melted butter. Press this mixture evenly into the bottom of a 9×13 inch pan. -
Step 2
Spread the softened vanilla ice cream evenly over the cookie crust. -
Step 3
In a saucepan, combine the 1/2 cup butter and evaporated milk. Heat over medium heat, stirring constantly, until the butter is melted and the mixture is smooth. -
Step 4
Whisk in the powdered confectioner’s sugar until the mixture is smooth and forms a caramel-like sauce. Stir in the Spanish peanuts. -
Step 5
Pour the peanut and caramel mixture evenly over the ice cream layer. -
Step 6
In a microwave-safe bowl, melt the semi-sweet chocolate chips. Stir until smooth. Drizzle the melted chocolate over the peanut layer. -
Step 7
Freeze for at least 4 hours, or until firm, before slicing and serving.
Important Information
Nutrition Facts (Per Serving)
It is important to consider this information as approximate and not to use it as definitive health advice.
Allergy Information
Please check ingredients for potential allergens and consult a health professional if in doubt.