Easy Peach Crisp Recipe – Sweet Summer Dessert
Peach Crisp. Oh, peach crisp. Just saying the words conjures up images of warm summer evenings, dripping with the sweet, sun-kissed essence of ripe peaches. It’s a dish that holds a special place in my heart, and I suspect in yours too. What is it about this humble dessert that captivates us? Is it the contrast? The perfectly tender, slightly tart peaches bursting with flavor, nestled beneath a crunchy, buttery, golden oat topping? I think it’s that magic combination of textures and tastes – the comforting warmth, the delightful crum extractble, and that unmistakable peachy perfume that fills the entire house. It’s simple, yes, but oh-so-satisfying. It’s the taste of pure, unadulterated comfort, a quintessential summer treat that never fails to bring a smile to my face.
The Ultimate Peach Crisp: A Taste of Summer Sunshine
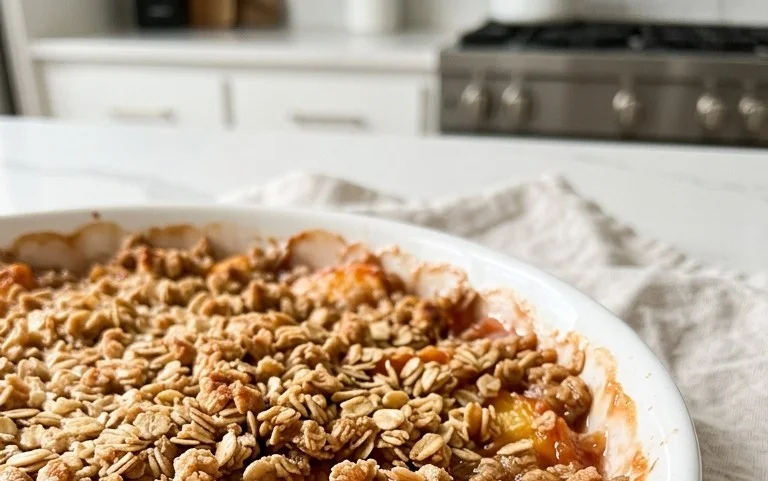
There’s something magical about the scent of baked peaches mingling with cinnamon and warm, buttery oats. Peach crisp is one of those desserts that embodies pure comfort and the sweet, fleeting joy of summer. It’s incredibly forgiving, wonderfully adaptable, and always a crowd-pleaser. Whether you’re a seasoned baker or just starting out, this recipe is designed to deliver a perfect crisp every time, with tender, juicy peaches nestled under a crunchy, golden topping. Get ready to fill your kitchen with the irresistible aroma of summer’s bounty!
Ingredients:
Preparation and Assembly:
Step 1: Preparing the Peaches for Perfection
Begin extract by preheating your oven to 375°F (190°C). This initial high heat is crucial for getting that beautiful crisp topping golden brown. Next, let’s turn our attention to the star of the show: the peaches. You’ll need about 8 cups of peeled and thinly sliced fresh peaches. If your peaches are exceptionally juicy, you might want to gently drain off any excess liquid after slicing, though a little juice is perfectly fine. In a large bowl, combine the sliced peaches with ½ cup of granulated sugar, ½ cup of the all-purpose flour, 1 tablespoon of cornstarch, 1 teaspoon of ground cinnamon, and ¼ teaspoon of salt. Give everything a gentle toss until the peaches are evenly coated. The granulated sugar will start to draw out some of the peaches’ natural juices, creating a lovely syrupy base. The cornstarch is key to thickening this syrup as it bakes, preventing a watery mess. The cinnamon adds that quintessential warmth that pairs so beautifully with peaches, and a pinch of salt enhances all the flavors. Pour this delightful peach mixture into a 9×13 inch baking dish. Spread it out evenly, ensuring a consistent layer of fruit.
Step 2: Crafting the Irresistible Crisp Topping
Now for the magical part – the crisp topping! In a separate medium bowl, combine the ¾ cup of packed light brown sugar, the remaining 2 tablespoons of all-purpose flour, the remaining 1 teaspoon of ground cinnamon, and the 1 ¾ cups of old-fashioned oats. The light brown sugar brings a lovely caramel note and helps the topping crisp up beautifully. Using old-fashioned oats is important here; they provide a satisfying chegrape juicess and texture that rolled oats or instant oats just can’t replicate. Whisk these dry ingredients together until they are well combined. This ensures that the sugar, flour, and oats are evenly distributed, leading to a uniform crisp.
Step 3: Incorporating the Butter for Ultimate Crispiness
This is where the magic truly happens! Add the ½ cup (1 stick) of room-temperature salted butter to the dry ingredients. Using room-temperature butter is essential. It should be soft enough to easily cut through but not so soft that it’s melted. If your butter is too cold, it will be difficult to incorporate evenly. If it’s too warm, it will melt too quickly and make the topping greasy rather than crum extractbly. Use a pastry blender, two forks, or even your fingertips to cut the butter into the dry ingredients. You want to work the butter in until the mixture resembles coarse crum extractbs, with some larger pea-sized pieces of butter still visible. These larger pieces are what will melt and create those glorious golden pockets of crispiness during baking. Don’t overmix it to a paste; the goal is a crum extractbly, textured topping.
Step 4: Assembling and Baking the Crisp
Once your crisp topping has reached the perfect crum extractbly consistency, it’s time to assemble your masterpiece. Sprinkle this glorious mixture evenly over the peach layer in the baking dish. Make sure to cover the entire surface of the peaches to create a cohesive crisp topping. Once evenly distributed, the crisp is ready for its transformation in the oven. Place the baking dish on a baking sheet. This is a good practice as it catches any potential drips or overflow from the bubbling fruit, making for easier cleanup. Slide the baking sheet into your preheated oven.
Step 5: The Bake and the Glorious Reveal
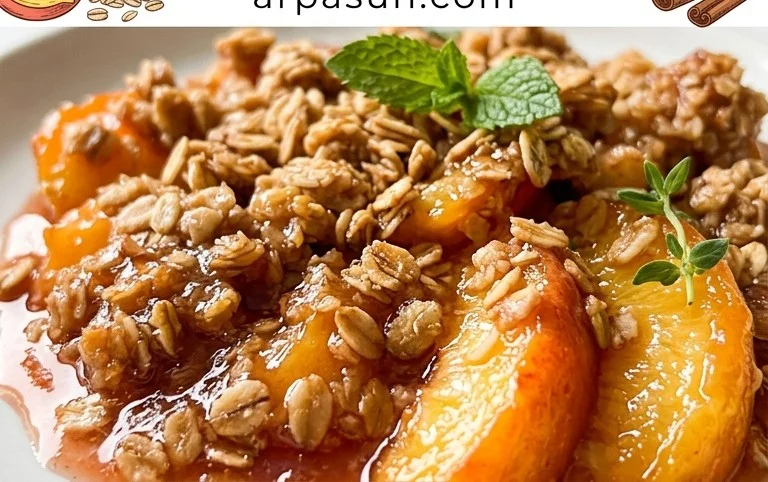
Bake the peach crisp for 35 to 45 minutes, or until the topping is golden brown and the peach filling is bubbling around the edges. The exact baking time can vary slightly depending on your oven and the juiciness of your peaches. Keep an eye on it during the last 15 minutes of baking. If the topping starts to brown too quickly before the filling is bubbling nicely, you can loosely tent the dish with aluminum foil to prevent it from burning. The irresistible aroma that will fill your kitchen is your cue that it’s almost ready! Once it’s done, carefully remove the peach crisp from the oven. Let it rest for at least 10-15 minutes before serving. This resting period is important; it allows the bubbling juices to thicken slightly and the crisp topping to firm up, making it easier to serve and ensuring you get a delightful scoop of both fruit and topping. Serve warm, ideally with a scoop of vanilla ice cream or a dollop of freshly whipped cream. The contrast of the warm, spiced crisp with the cool, creamy topping is simply divine. Enjoy this taste of pure summer!
Conclusion:
And there you have it – a delightful and wonderfully simple recipe for the most amazing Peach Crisp! I truly believe this recipe stands out because it balances the sweet, juicy tenderness of ripe peaches with a perfectly crum extractbly, buttery topping that has just the right amount of crunch. It’s incredibly forgiving, meaning even if your peaches aren’t perfectly ripe, the magic of baking will still bring out their best flavor. This Peach Crisp is a testament to how simple ingredients can create something truly spectacular, perfect for a cozy evening or a gathering with friends.
This versatile dessert shines on its own, but for an extra treat, I love serving it warm with a generous scoop of vanilla bean ice cream or a dollop of fresh whipped cream. A drizzle of caramel sauce is also a divine addition! Don’t be afraid to experiment with variations. Feel free to add a pinch of cardamom or nutmeg to the topping for a warmer spice note, or even incorporate a handful of blueberries or raspberries into the peach filling for a delightful berry-peach blend. I wholeheartedly encourage you to give this Peach Crisp recipe a try – I’m confident it will become a beloved go-to in your dessert repertoire.
Frequently Asked Questions:
Q: What are the best kinds of peaches to use for this recipe?
A: While any ripe, sweet peaches will work wonderfully, freestone varieties are generally preferred as they are easier to pit and prepare. Look for peaches that yield slightly to gentle pressure and have a lovely aroma.
Q: Can I make this Peach Crisp ahead of time?
A: Yes, you absolutely can! You can prepare the peach filling and the crisp topping separately and store them in the refrigerator for up to 24 hours. Assemble and bake just before serving for the best texture.
Q: How do I store leftover Peach Crisp?
A: Store any leftovers in an airtight container in the refrigerator for up to 3-4 days. It’s delicious served cold, or you can gently reheat individual portions in the oven or microwave.
Peach Crisp
A classic and comforting peach crisp with a buttery oat topping, perfect for any occasion.
Ingredients
-
8 cups peeled and thinly sliced fresh peaches
-
½ cup granulated sugar
-
½ cup all-purpose flour
-
1 tablespoon cornstarch
-
1 teaspoon ground cinnamon
-
¼ teaspoon salt
-
¾ cup packed light brown sugar
-
½ cup (1 stick) salted butter, room temperature
-
1 ¾ cup old-fashioned oats
-
2 tablespoons all-purpose flour
-
1 teaspoon ground cinnamon
Instructions
-
Step 1
Preheat oven to 375°F (190°C). Butter a 9×13 inch baking dish. -
Step 2
In a large bowl, toss the sliced peaches with ½ cup granulated sugar, ½ cup all-purpose flour, cornstarch, 1 teaspoon cinnamon, and ¼ teaspoon salt. Pour into the prepared baking dish. -
Step 3
In a separate medium bowl, combine the packed light brown sugar, 2 tablespoons all-purpose flour, and 1 teaspoon cinnamon. Cut in the room temperature butter with a pastry blender or your fingertips until the mixture resembles coarse crumbs. -
Step 4
Stir in the old-fashioned oats. Sprinkle the oat mixture evenly over the peaches. -
Step 5
Bake for 35-40 minutes, or until the topping is golden brown and the filling is bubbly. -
Step 6
Let cool slightly before serving. Serve warm, perhaps with vanilla ice cream.
Important Information
Nutrition Facts (Per Serving)
It is important to consider this information as approximate and not to use it as definitive health advice.
Allergy Information
Please check ingredients for potential allergens and consult a health professional if in doubt.