Perfect Ramen Eggs Ajitama Recipe – Flavorful
Ramen eggs, also known as ajitama, are more than just a topping for your noodle soup; they’re a culinary revelation. These perfectly marinated, jammy-yolked delights are a cornerstone of any truly satisfying bowl of ramen, transforming a simple dish into an unforgettable experience. Have you ever savored that rich, savory burst of flavor that complements the broth and noodles so perfectly? That’s the magic of a well-made ramen egg! What makes ajitama so special is the transformative marinade. We’re talking about a delicate balance of soy sauce, non-alcoholic mirin, and non-alcoholic sake that seeps into the egg white, infusing it with incredible umami, while leaving the yolk gloriously gooey and custardy. They’re not just eggs; they’re little spheres of pure deliciousness that elevate every bite. I’m so excited to share my foolproof method for creating these addictive ramen eggs at home.
Ramen Eggs (Ajitama)
There’s something undeniably magical about a perfectly cooked ramen egg, also known as Ajitama. The rich, jammy yolk, infused with savory, slightly sweet marinade, elevates any bowl of ramen from good to absolutely sublime. These aren’t just any hard-boiled eggs; they’re a labor of love, a little flavor bomb waiting to burst into your broth. Learning to make them at home is surprisingly simple, and the rewards are immense. Imagin extracte opening up your homemade ramen and finding these glistening, marinated gems nestled on top. It’s a culinary triumph you can achieve in your own kitchen.
The beauty of Ajitama lies in its simplicity and the depth of flavor it offers. The key is achieving that perfect soft-boiled egg consistency – a tender white with a custardy, molten yolk. Then, the marinade works its magic, transforming a humble egg into something truly special. This recipe focuses on achieving that ideal texture and infusing it with a balanced, savory-sweet flavor profile that complements ramen beautifully. While you can find pre-made ramen eggs in some specialty stores, nothing compares to the satisfaction of making your own. Plus, you can adjust the marinade to your personal preference.
Ingredients:
*Note: Using eggs that are a few days old can make them easier to peel. Fresh eggs can sometimes be more difficult to get out of their shells without tearing. If you only have very fresh eggs, you might find the vinegar in the boiling water helps slightly with the peeling process.
Cooking Instructions
The process of making Ajitama can be broken down into two main stages: cooking the eggs to perfection and then marinating them to infuse them with flavor. Each step is crucial for achieving that coveted texture and taste.
Phase 1: Perfecting the Soft-Boiled Eggs
This is arguably the most critical step, as the texture of your egg directly impacts the overall Ajitama experience. We’re aiming for a fully cooked but still wonderfully soft and jammy yolk.
1. Prepare Your Boiling Station: You’ll need a medium saucepan that can comfortably hold all six eggs in a single layer. Fill the saucepan with enough cold water to cover the eggs by about an inch. If you’re using very fresh eggs or are concerned about peeling, you can add a tablespoon of vinegar to the water. The acidity from the vinegar is believed to help slightly denature the proteins in the egg white, making them easier to separate from the shell. Bring the water to a rolling boil over medium-high heat.
2. Gently Introduce the Eggs: Once the water is at a vigorous boil, carefully lower the eggs into the water using a slotted spoon. This is important to prevent cracking. If you drop them from a height, they are more likely to hit the bottom of the pot and crack. Maintaining a gentle boil is key; you don’t want a violent boil that will jostle the eggs around and potentially cause them to crack or cook unevenly. Reduce the heat slightly if necessary to maintain a gentle, consistent boil.
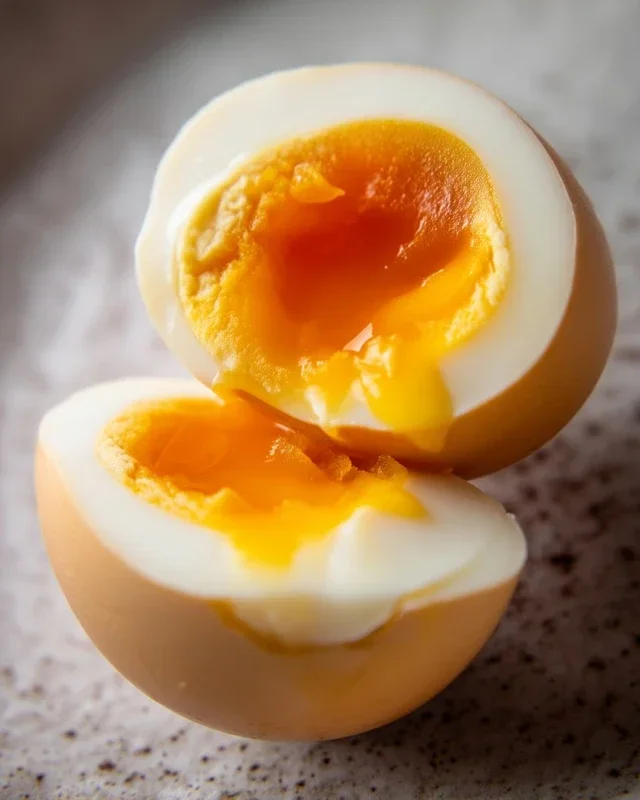
3. The Crucial Cooking Time: Now comes the precise part. For that perfect jammy yolk, I recommend boiling the eggs for exactly 6 minutes and 30 seconds. If you prefer a slightly firmer yolk but still with a creamy center, you can go up to 7 minutes. If you prefer a more fully cooked yolk, aim for 8 minutes, though you’ll lose some of that characteristic ramen egg richness. Start a timer the moment the eggs are submerged in the boiling water. Once the timer goes off, immediately remove the eggs from the boiling water using your slotted spoon.
4. The Shocking Truth: Ice Bath Transformation: This step is non-negotiable for stopping the cooking process and making peeling easier. Prepare a large bowl filled with ice and cold water. As soon as the eggs are out of the boiling water, transfer them directly into the ice bath. Let them sit in the ice bath for at least 10-15 minutes. This rapid cooling is essential. It not only stops the eggs from continuing to cook (which would lead to a hard yolk) but also helps the membrane inside the eggshell contract slightly, creating a small gap between the egg white and the shell, making peeling much less frustrating.
Phase 2: Crafting the Flavorful Marinade
While your eggs are chilling, it’s time to whip up the delicious marinade that will give them their signature Ajitama flavor.
5. Mix and Marinate: In a small saucepan or a heatproof bowl, combine the ½ cup of light sodium soy sauce, ¼ cup of water, ¼ cup of non-non-non-alcoholic alternativeic non-alcoholic mirin, and 2 tablespoons of granulated sugar. If you’re using a saucepan, gently heat the mixture over low heat, stirring until the sugar is completely dissolved. You don’t need to bring it to a boil; just ensure it’s well combined. If you’re using a bowl, you can stir vigorously until the sugar dissolves. Once the sugar is dissolved and the mixture is lukewarm or at room temperature, pour it into a resealable plastic bag or a small container with a lid.
6. The Marriage of Egg and Marinade: Once your eggs have thoroughly chilled and are cool enough to handle, it’s time to peel them. Gently tap each egg on a hard surface and then roll it around to crack the shell all over. Start peeling from the wider end of the egg. If you did the ice bath correctly, the shell should slip off relatively easily. Once peeled, carefully place the eggs into the bag or container with the marinade. Ensure the eggs are fully submerged in the liquid. If they’re floating, you can press them down gently. Seal the bag or container tightly and refrigerate.
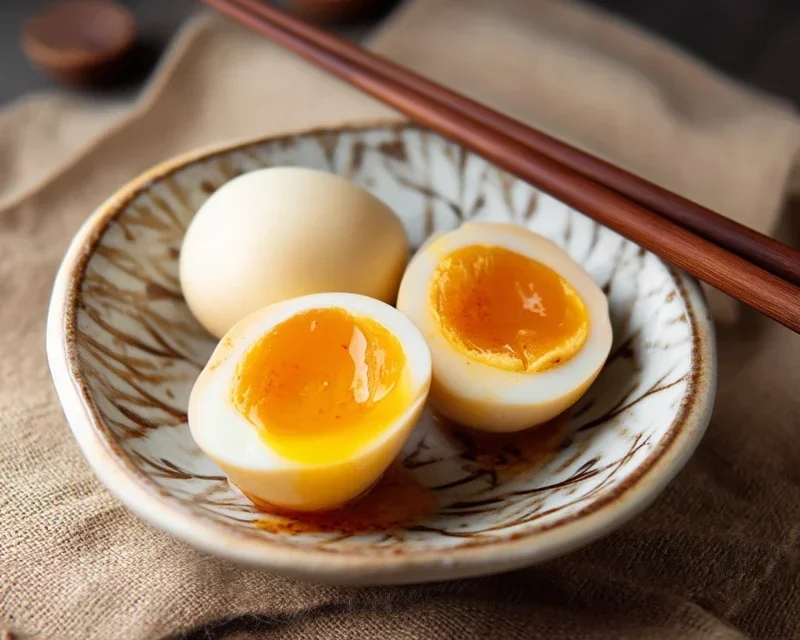
7. Patience is a Virtue (and Flavor): For the best flavor, let the Ajitama marinate for at least 6 hours, but ideally 12-24 hours. The longer they marinate, the deeper the flavor will penetrate the egg. You can turn them occasionally to ensure even marination. Once they’ve marinated to your liking, they are ready to be sliced in half and served atop your favorite ramen. The leftover marinade can be saved and used in other dishes, like stir-fries or dressings, though it’s best to use it within a week. Enjoy the fruits of your labor!
Conclusion:
And there you have it! Crafting perfect Ramen Eggs, also known as Ajitama, is surprisingly simple and incredibly rewarding. This recipe is fantastic because it transforms an everyday ingredient into something truly special, adding a burst of savory, umami-rich flavor and a beautiful, custardy texture to any dish. The magic lies in the marination, infusing the eggs with that irresistible ramen broth goodness. You’ll find yourself reaching for these marinated masterpieces time and time again!
Serving suggestions are endless! Of course, they are the quintessential topping for a steaming bowl of ramen, elevating it to restaurant-quality. But don’t stop there! Slice them in half and add them to rice bowls, enjoy them in salads for an extra protein punch, or even serve them as a unique appetizer. Get creative and discover your own favorite ways to enjoy these delicious treats.
Looking for ways to mix things up? Feel free to experiment with your marinade! A splash of non-alcoholic mirin adds sweetness, while a touch of chili oil can bring a gentle warmth. Some people even add a bit of non-alcoholic sake for added depth. The beauty of this recipe is its adaptability. I truly encourage you to give making your own Ramen Eggs a try. It’s a small effort for a huge flavor payoff, and you’ll be so proud of your delicious creations!
Frequently Asked Questions about Ramen Eggs (Ajitama)
How long do Ramen Eggs last in the refrigerator?
Once marinated, your delicious Ramen Eggs should last for about 3 to 4 days when stored in an airtight container in the refrigerator. Always make sure they are fully submerged in the marinade for optimal preservation and flavor.
Can I use different types of soy sauce for the marinade?
Absolutely! While regular or low-sodium soy sauce is a great base, you can definitely experiment. Using a darker soy sauce will result in a richer color and a slightly deeper flavor. Some people even like to combine soy sauce with tamari for a gluten-free option or add a touch of oyster sauce for an extra layer of umami.
What is the best way to peel the eggs after marinating?
The key to easy peeling is the initial cooking of the eggs. Make sure your eggs are at room temperature and that you use cold water to shock them immediately after boiling. Gently cracking the shell all over and then peeling them under cool running water can also make the process much smoother. If they are a little tricky, don’t worry, a few little white bits won’t affect the amazing flavor!
Ramen Eggs (Ajitama)
Perfectly marinated soft-boiled eggs for ramen, with a jammy yolk and savory-sweet flavor.
Ingredients
-
6 large eggs
-
1/2 cup soy sauce (light sodium)
-
1/4 cup water
-
1/4 cup non-alcoholic mirin
-
2 tablespoons granulated sugar
-
Vinegar (optional, for boiling)
Instructions
-
Step 1
Bring a pot of water to a rolling boil. If using, add a splash of vinegar to the water. -
Step 2
Gently lower the eggs into the boiling water. Cook for exactly 6 minutes and 30 seconds for jammy yolks. -
Step 3
Immediately transfer the eggs to an ice bath to stop the cooking process. Let them chill for at least 10 minutes. -
Step 4
While eggs are chilling, combine soy sauce, water, non-alcoholic mirin, and granulated sugar in a medium bowl or container. Stir until sugar is dissolved. -
Step 5
Peel the chilled eggs carefully. -
Step 6
Place the peeled eggs into the marinade. Ensure they are fully submerged. Cover and refrigerate for at least 8 hours, or preferably overnight. -
Step 7
Remove eggs from marinade, slice in half, and serve.
Important Information
Nutrition Facts (Per Serving)
It is important to consider this information as approximate and not to use it as definitive health advice.
Allergy Information
Please check ingredients for potential allergens and consult a health professional if in doubt.